Use the ChatGPT node to add conversational AI capabilities to your apps, products, or services. This node can follow instructions and provide detailed responses based on your input.
Models:
- GPT-4O: Optimized and powerful, ideal for efficient, complex tasks.
- GPT-4O Mini: Lightweight and quick, suitable for simpler, real-time applications.
- GPT-4O Turbo: Ultra-fast version for high-traffic or time-sensitive environments.
- GPT-4: Highly advanced, versatile model for in-depth tasks.
- GPT-3.5 Turbo: Efficient and conversational, perfect for responsive chatbots and assistants.
- O1 Preview: A beta model for exploring new capabilities and features.
- O1 Mini: Compact, resource-light model for small-scale or on-device applications.
Roles in Messages (system, user, assistant)
-
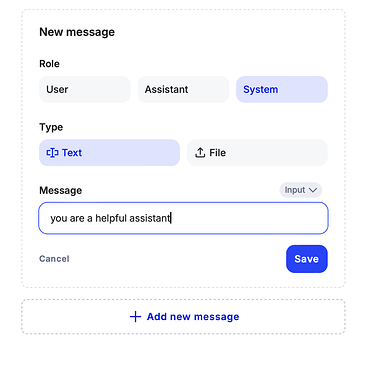
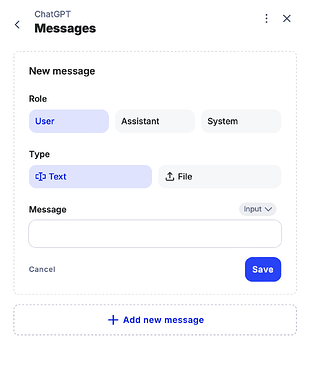
System: This message sets the tone or behavior for the assistant. It’s like giving the assistant instructions on how to respond. For example, “You are a helpful assistant” might be a system message.
-
User: This is the message that comes from you. It’s your question or input that the assistant responds to.
-
Assistant: This is the response given by ChatGPT. It’s what you get back after the model processes the conversation. The Assistant role is needed to create message chains that simulate a chat. A message from this role is considered an answer from GPT itself in this dialog.
Temperature
-
Temperature controls how creative or random the AI’s responses are.
-
Higher values (like 0.8 or 1): The model will give more varied or creative answers.
-
Lower values (like 0.1 or 0.2): The model will respond in a more focused or deterministic way (less creative, more predictable).
Think of it this way: if you want the assistant to give you straightforward, safe answers, use a low temperature. If you want creative, possibly unexpected responses, use a higher temperature.
Top P
-
Top P (also called “nucleus sampling”) controls how broad the range of possible words or phrases the model selects from.
-
Top P = 1: The model will consider all possible responses.
-
Top P = 0.5: The model will only consider responses that cover the top 50% of possibilities.
Top P and Temperature both affect randomness. While you can use them together, typically adjusting just one is enough.
Stop
- The Stop parameter allows you to specify specific words or punctuation that will stop the assistant’s response. For example, if you tell it to stop generating after a specific phrase or punctuation mark, it will cut off the response when it reaches that point.
N
- N controls how many responses the API eturns at once. If you set n=3, you’ll get 3 different responses for one input. This can be useful if you want to choose between multiple options or compare answers.
Max Tokens
-
Max Tokens defines the maximum length of the response in terms of tokens. Tokens are pieces of text (which can be as small as one character or as large as one word).
-
Example: “ChatGPT is awesome” is 4 tokens (each word is a token).
The more tokens you allow, the longer the response. However, the total number of tokens in a request (input + response) can’t exceed a limit (for example, 4,096 tokens for some models).
Presence Penalty
-
Presence Penalty encourages or discourages the model from talking about new topics it hasn’t already mentioned.
-
Higher values (up to 2): The model will be encouraged to explore new topics more and to avoid repetition.
-
Lower values (negative): The model will talk more about topics it’s already mentioned.
Example: If you’ve been talking about “cats,” a higher presence penalty might make it less likely to repeat information about cats.
Frequency Penalty
-
Frequency Penalty prevents the model from repeating the same words too often in its responses.
-
Higher values mean that the model is less likely to repeat itself.
This is useful if you want more diverse wording in responses.
Response Format
- You can request the output to be in a specific format like plain text, JSON, or even code.
For example:
-
Plain text: Just regular words with no special formatting.
-
Markdown: A text format used for writing (you can use it for headings, lists, etc.)
-
JSON: A structured format used for data, like { “message”: “Hello” }.
You can specify how the assistant should format the response based on your needs.
How to use on Scade: setting up a simple flow with ChatGPT
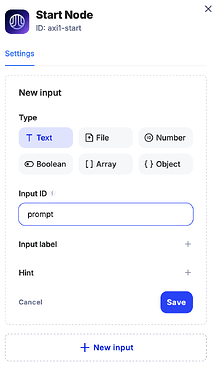
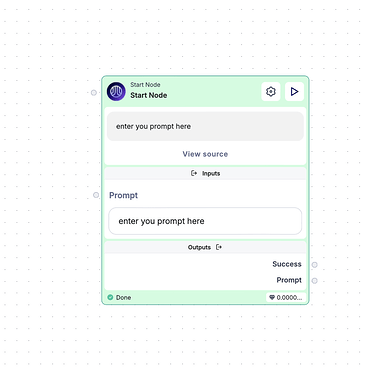
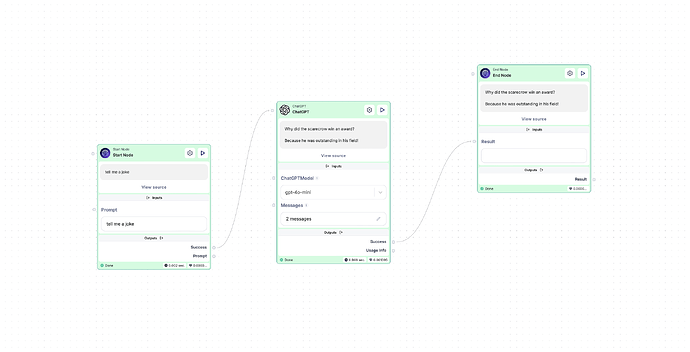
1. Configuring the Start node
First, let’s create an input text field in the Start node.
This will allow us to enter a prompt.
However, the node should only execute when you press the Play button.
2. Configuring the ChatGPT node
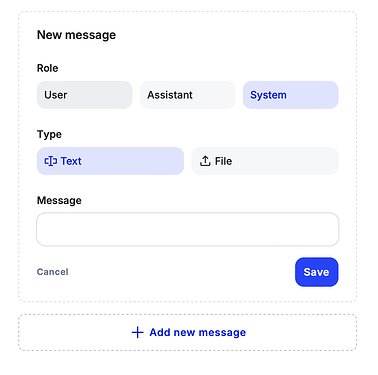
Next, let’s add and configure the ChatGPT node. You can do this by either clicking on it or dragging it from the panel on the left to the workspace. Once added, click on the node’s pencil icon to access the message configurations.
- System Role: Set the system role. In this case, we want the ChatGPT node to act as a helpful assistant. Remember to save your changes once completed.
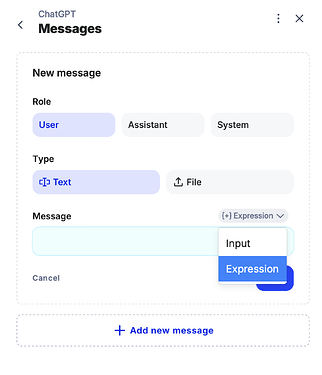
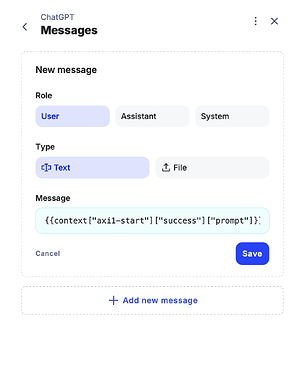
- User Message: Now, let’s configure the user message. Go back to the message settings, leaving the role unchanged as "User.” Since we can’t directly connect our prompt due to the ChatGPT node syntax, we’ll need to use an expression.
3. Using expressions
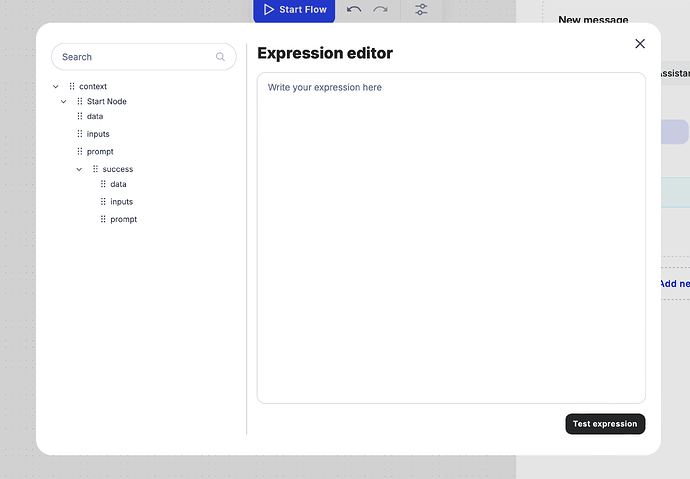
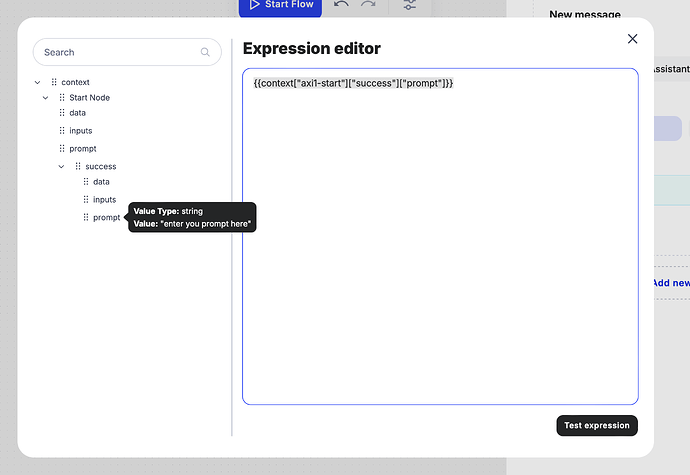
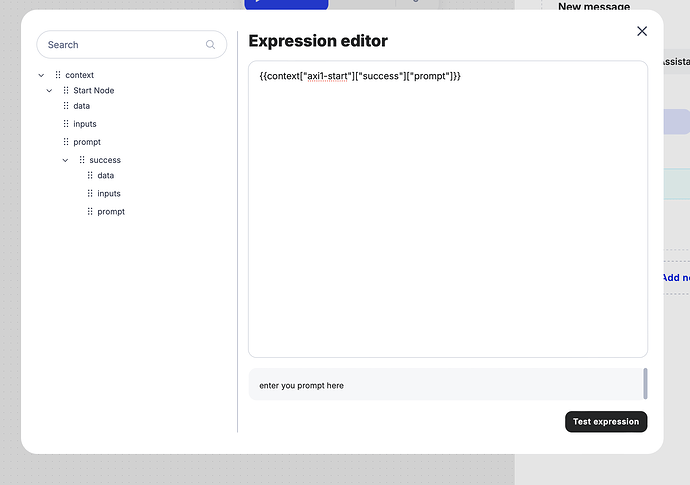
In the menu on the left, locate the result of the input from our Start node and drag it to the right panel. To verify your expression, use the “Test Expression” feature to ensure it’s correctly added.
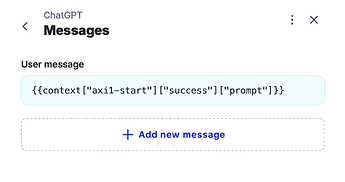
The message should now be properly set. Don’t forget to save your changes!
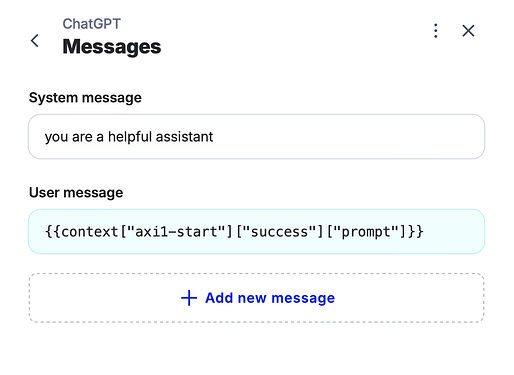
Here is the completely configured node.
4. Connecting the nodes
Now that the nodes are configured, let’s connect the flow:
-
First, connect the Start node to the ChatGPT node by dragging the success circle to the ChatGPT node’s starting point.
-
Next, connect the success point of the ChatGPT node to the End node.
5. Configuring the End node
In the End node, add a result text field to capture and display the response generated by ChatGPT.
6. Testing the flow
It’s time to test the setup! Type “Tell me a joke” in the prompt field and press Start Flow at the top of the page.
And that’s it! Your flow is now working and should return a joke from ChatGPT.
Here we go.
ChatGPT combined with other nodes
Here are some examples of how the ChatGPT node is used in multimodal flows.
“YouTube Helper” template
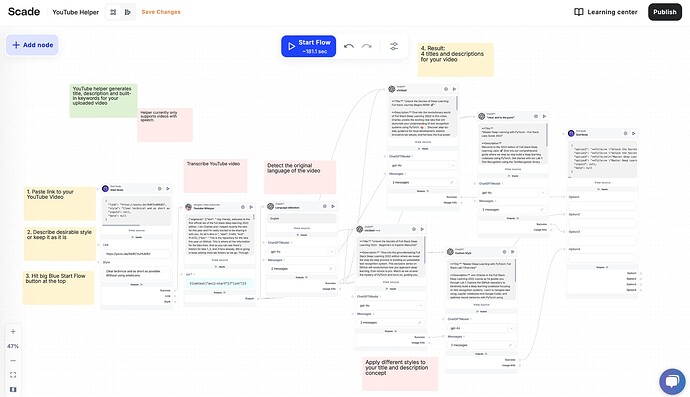
Let’s explore how the ChatGPT node is applied in the YouTube Helper template. This tool is designed to help you generate an optimized title and description for your YouTube videos.
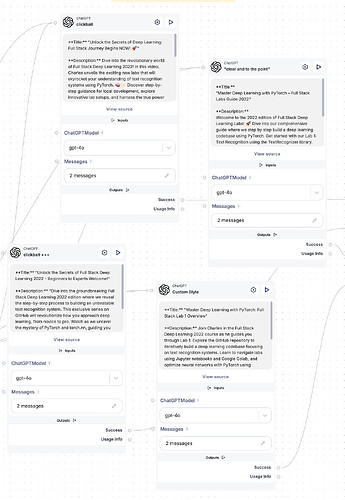
In this workflow, you’ll notice there are five ChatGPT nodes. So, how does it all work?
First, you upload the video you’re planning to post on YouTube. The workflow begins with YouTube Whisperer, which automatically transcribes the video. The first ChatGPT node detects the video’s language, ensuring the title and description are generated in the same language. You can set the language manually if needed, but automating this step ensures a smoother process, especially when working with multilingual content.
Next, there are four additional ChatGPT nodes, each with its own SEO role, applying different styles and terminology. These roles are crucial for fine-tuning the output based on user goals and preferences. For example, one node might focus on a formal tone with technical language for a specific audience, while another uses casual, engaging language for broader appeal.
The roles assigned by the user to each ChatGPT node help shape the output to meet specific SEO objectives. These can include maximizing keywords for visibility, tailoring the title and description for a specific target demographic, or following trends that could boost the video’s ranking on YouTube.
By applying multiple ChatGPT nodes with different roles, the system generates a range of optimized content that enhances your video’s discoverability and engagement while aligning with the style and tone you envision.
“Try Clothing on a Generated Character” template
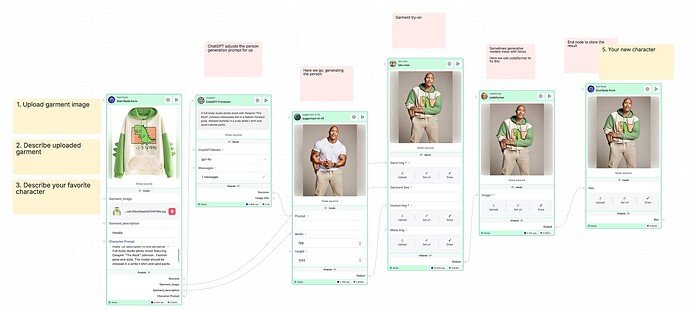
Let’s take a look at the “Try Clothing on a Generated Character” template. Here, the ChatGPT node refines the user’s input to create a clearer, more precise prompt for the Juggernaut node, which manages character generation.
This step is crucial because it ensures the Juggernaut node receives well-structured instructions. Clear, detailed prompts lead to more accurate and tailored character models, while vague inputs can result in mismatches. By enhancing the prompt, ChatGPT ensures that the generated character closely aligns with the user’s expectations, improving overall results.
“Extract product pros and cons” template
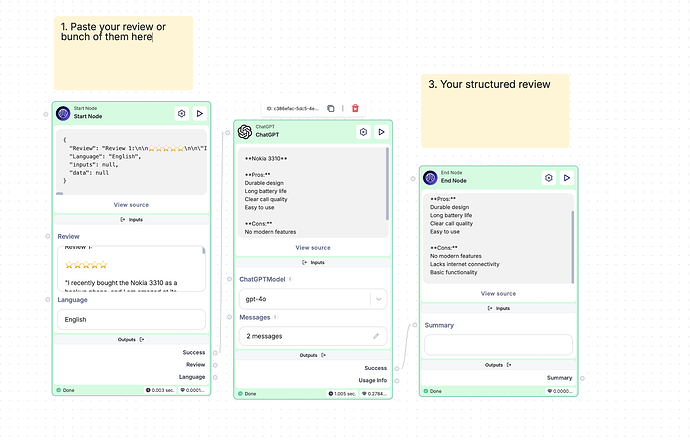
Let’s take a look at the “Extract product pros and cons” template. Here, the ChatGPT node helps to summarise the key points of each review and categorise them into pros and cons of a product.
