AI Agents are an exciting new feature that automatically handles tasks by connecting different workflows on Scade and connecting them to the external tools. You can also add various knowledge to an agent to use in the tasks.
This tutorial guides you through creating a Twitter agent on Scade that can automate posting tweets. Follow these steps to set up your agent and connect it to Twitter.
Here’s how to create your own Twitter agent:
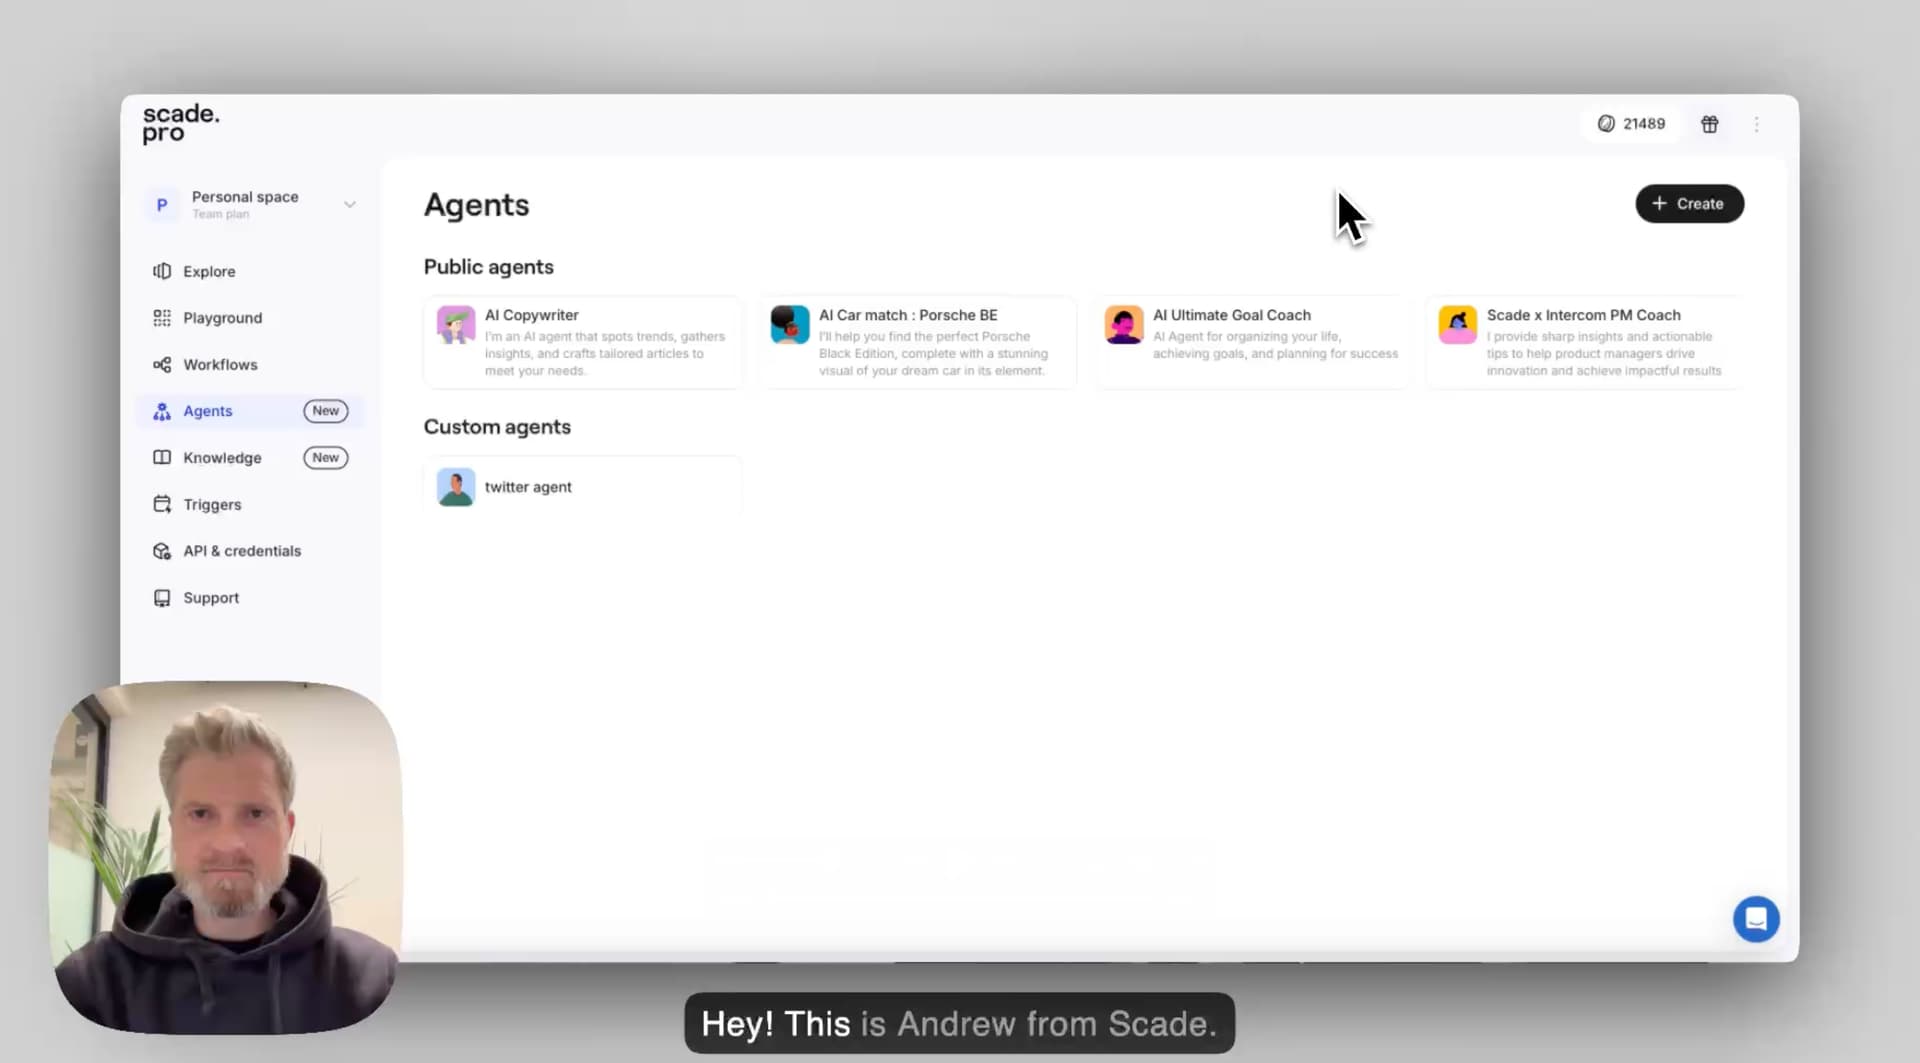
Step 1: Access the Agent section
- Go to the Agent section on the left menu to browse and manage AI Agents.
- Pre-built agents are available, but you’ll learn how to create one from scratch.
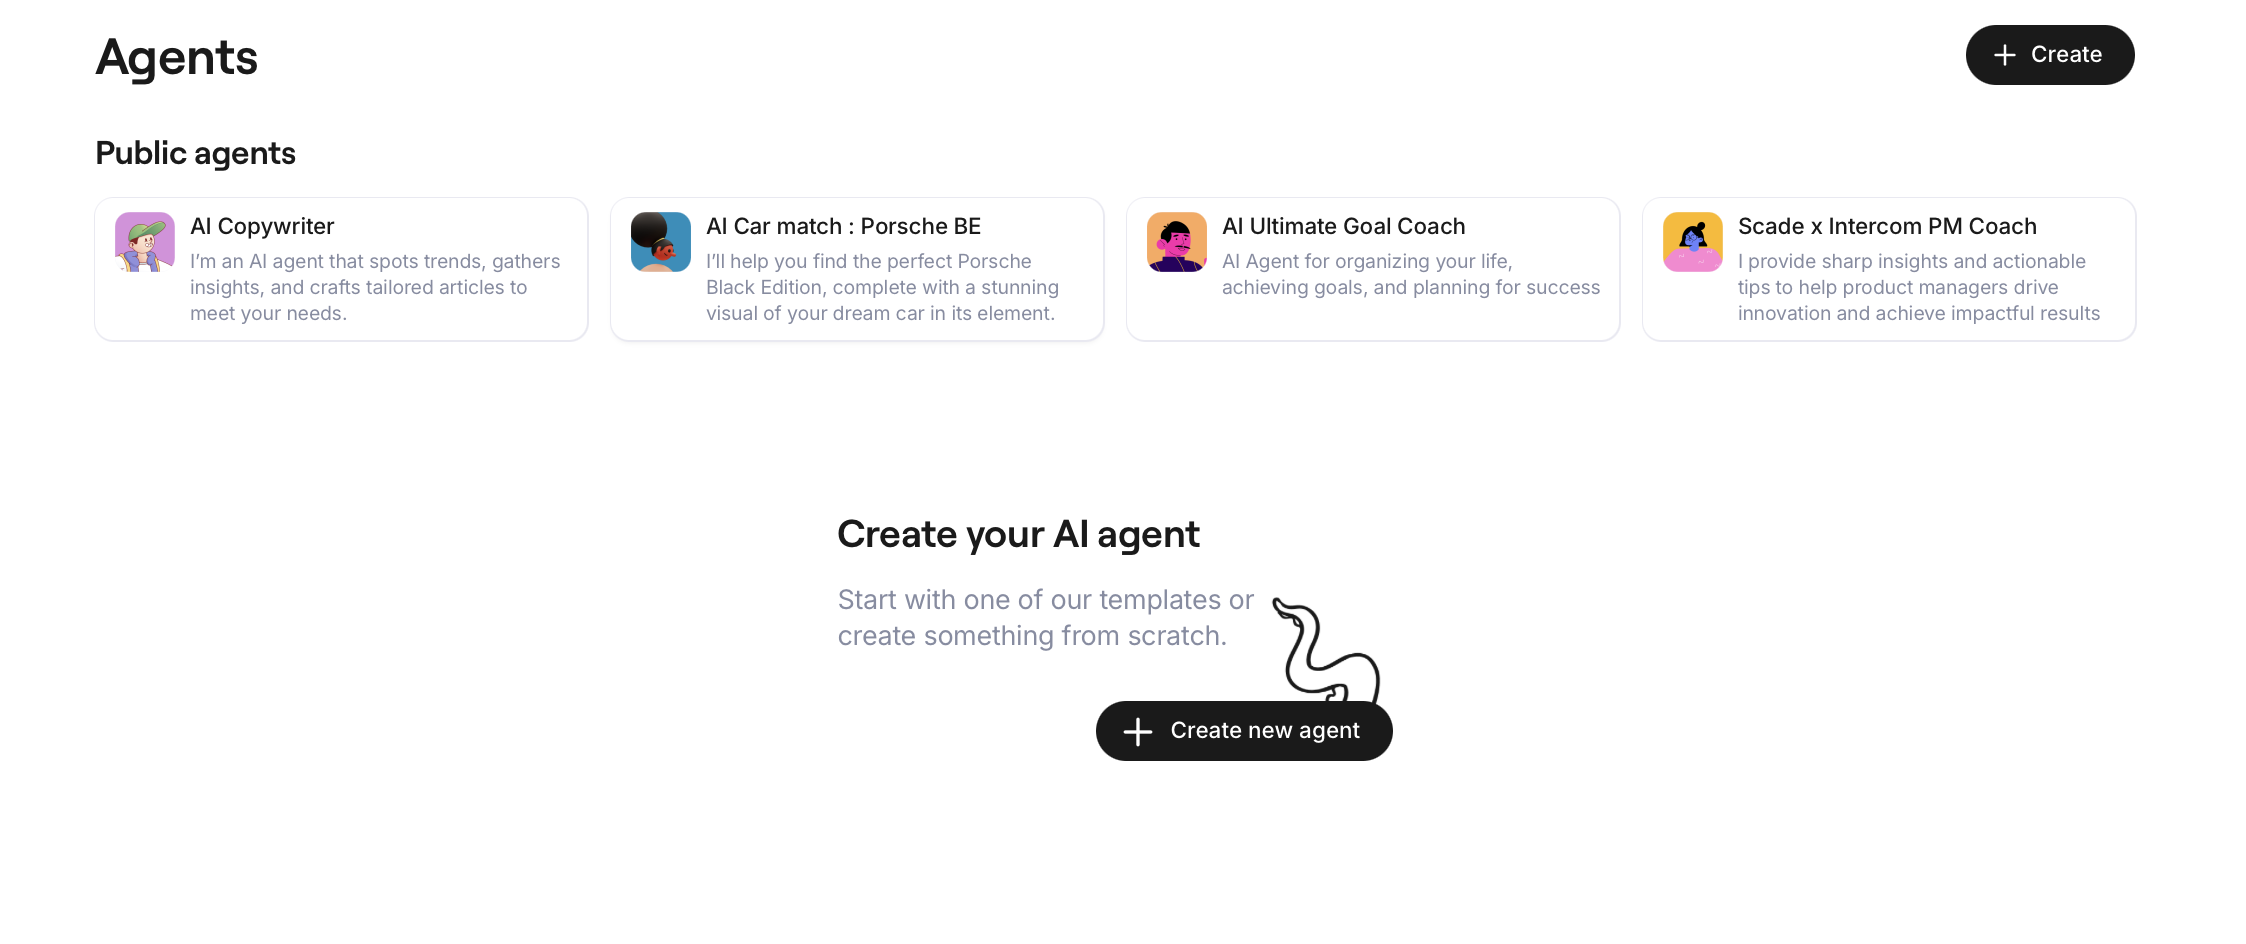
Step 2: Create a new agent
- Click on “Create” to begin setting up a new agent.
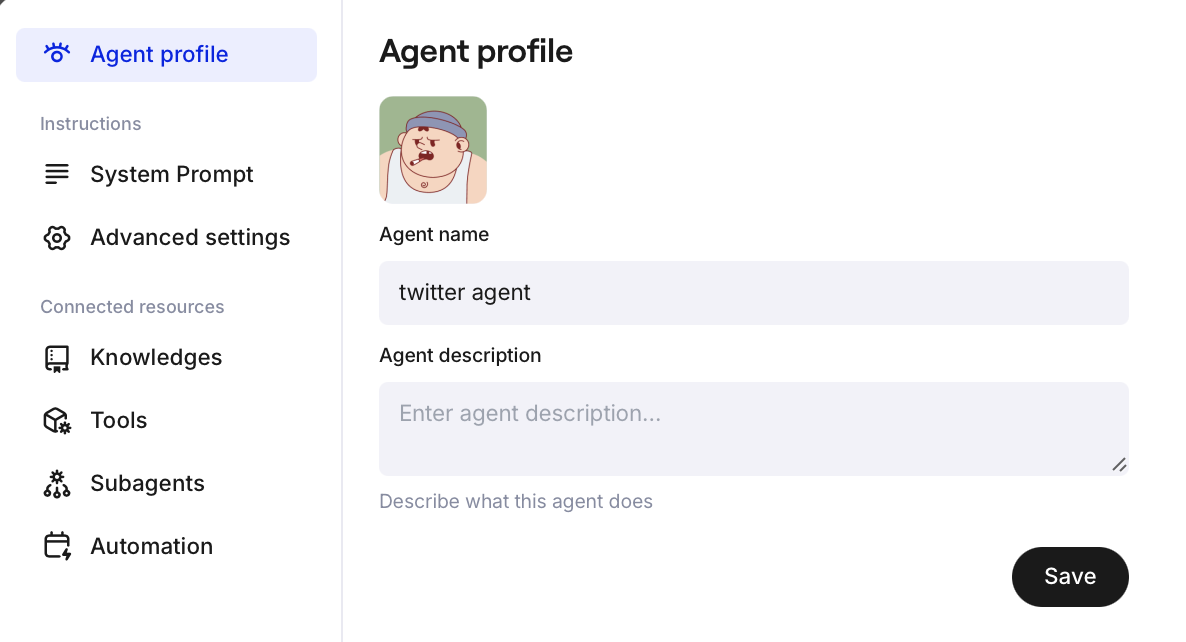
- An agent profile is generated automatically, complete with an image. You can change this image.
- Assign a name to your agent, such as “Twitter Agent.”
- Optionally, provide a description to clarify the agent’s purpose.
Step 3: Configure system settings
- Skip the system prompt if you prefer to customize it later.
- Choose the model for your agent from the advanced settings. At present, ChatGPT models are used, and 4.0 mini is recommended for optimal responses.
- Set the temperature to control task precision. Lower temperatures yield precise task execution, whereas higher temperatures introduce more variation.
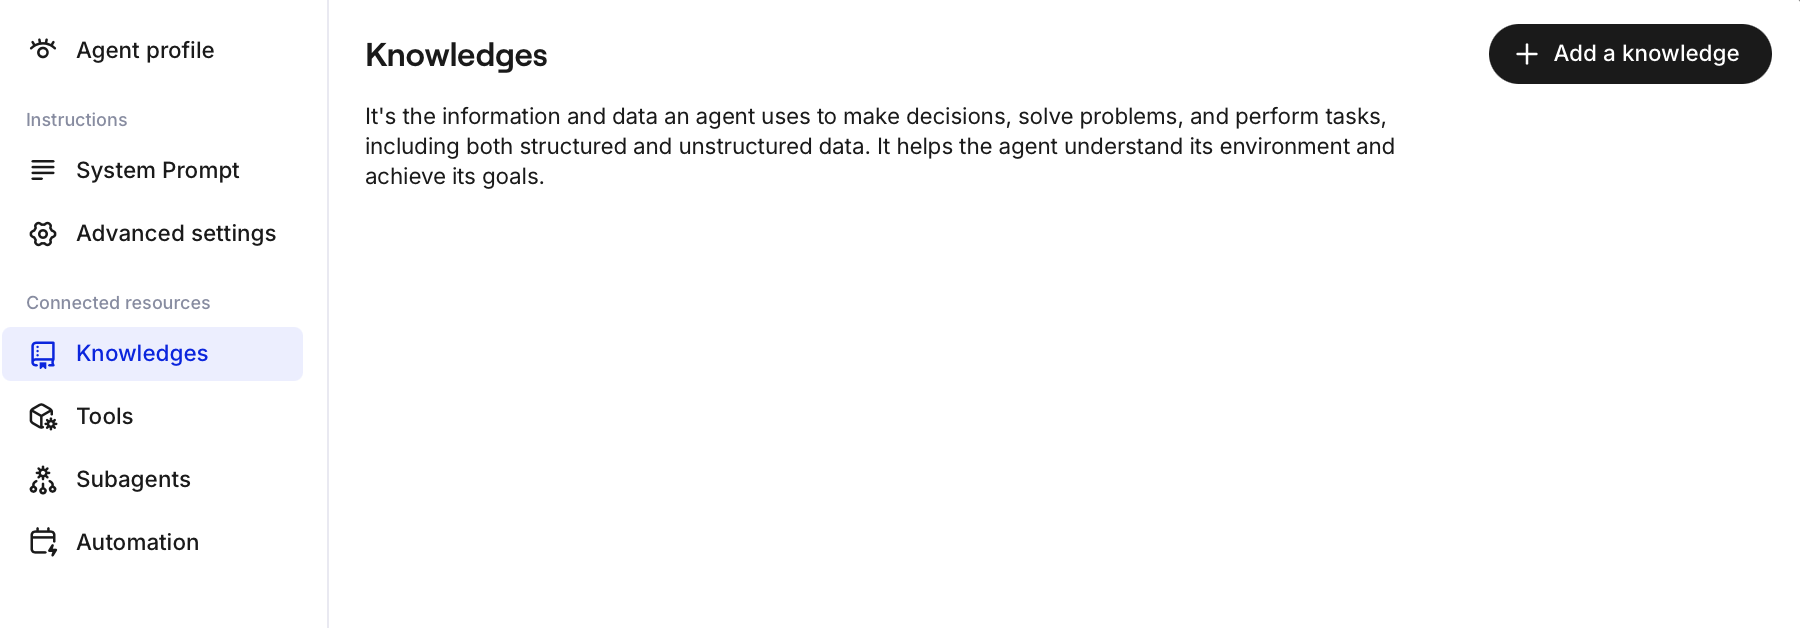
Step 4: Add knowledge base
- A knowledge base allows the agent to reference information. You can upload knowledge in various formats, such as PDFs.
- For instance, you might upload a resume as a knowledge base for the agent to access information.
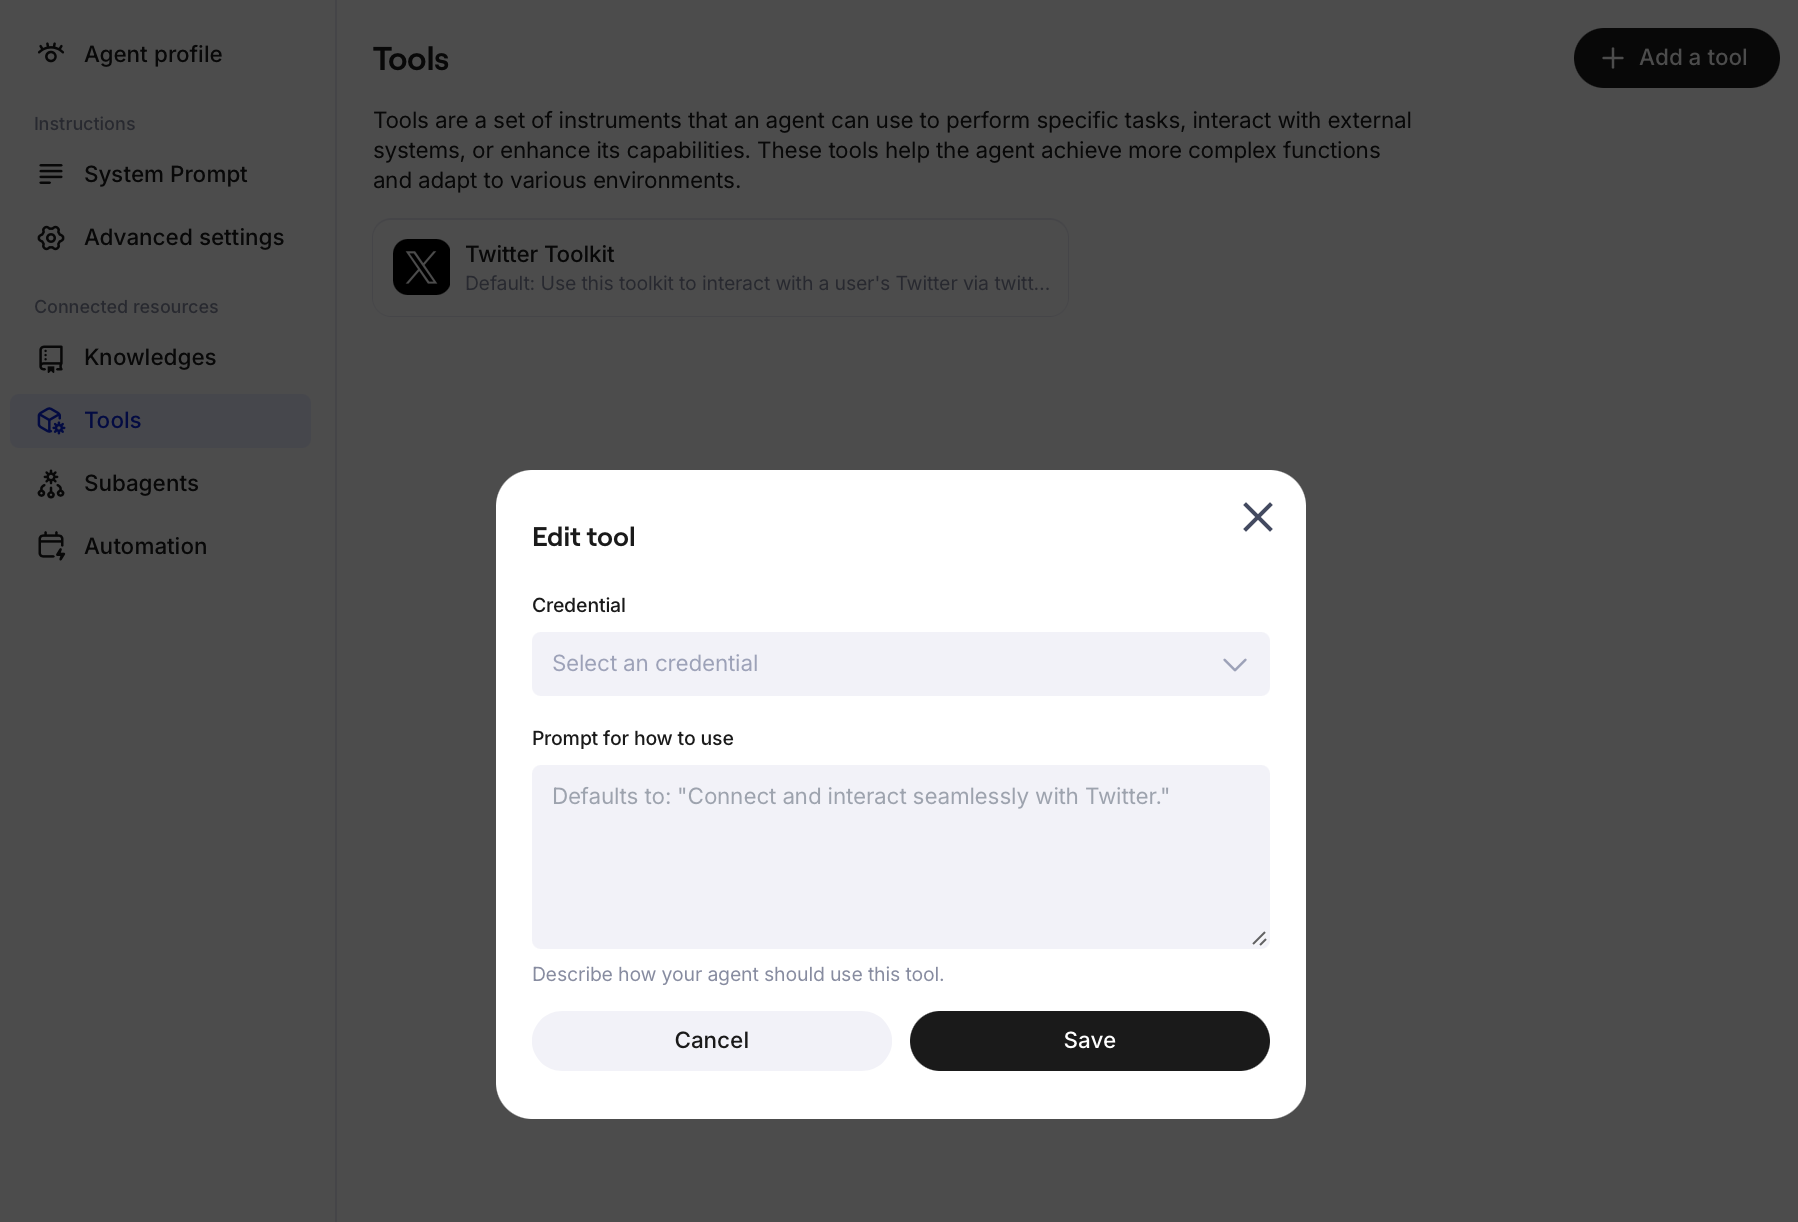
Step 5: Select tools
- Attach tools to the agent; in this tutorial options include Google Search and a Twitter toolkit for this example.
- These tools will be used to perform tasks like posting tweets.
Step 6: Save your agent
- After configuring the knowledge and tools, name your agent and click “Save.”
- Your Twitter agent is now prepared, with attached knowledge and tools.
Step 7: Connect to Twitter API
- Visit the Twitter Developer Platform at developer.x.com and click on the Developer portal

Step 8: Register on Twitter developer platform
- Sign up for a free developer account to access Twitter’s APIs.
- Comply with the terms and conditions and provide details on your intended API use. Use standard text indicating personal use and integrity. Accept all the options bellow and click submit.
Step 9: Set up Twitter app
- Once registered, navigate to the project tab and then app settings.
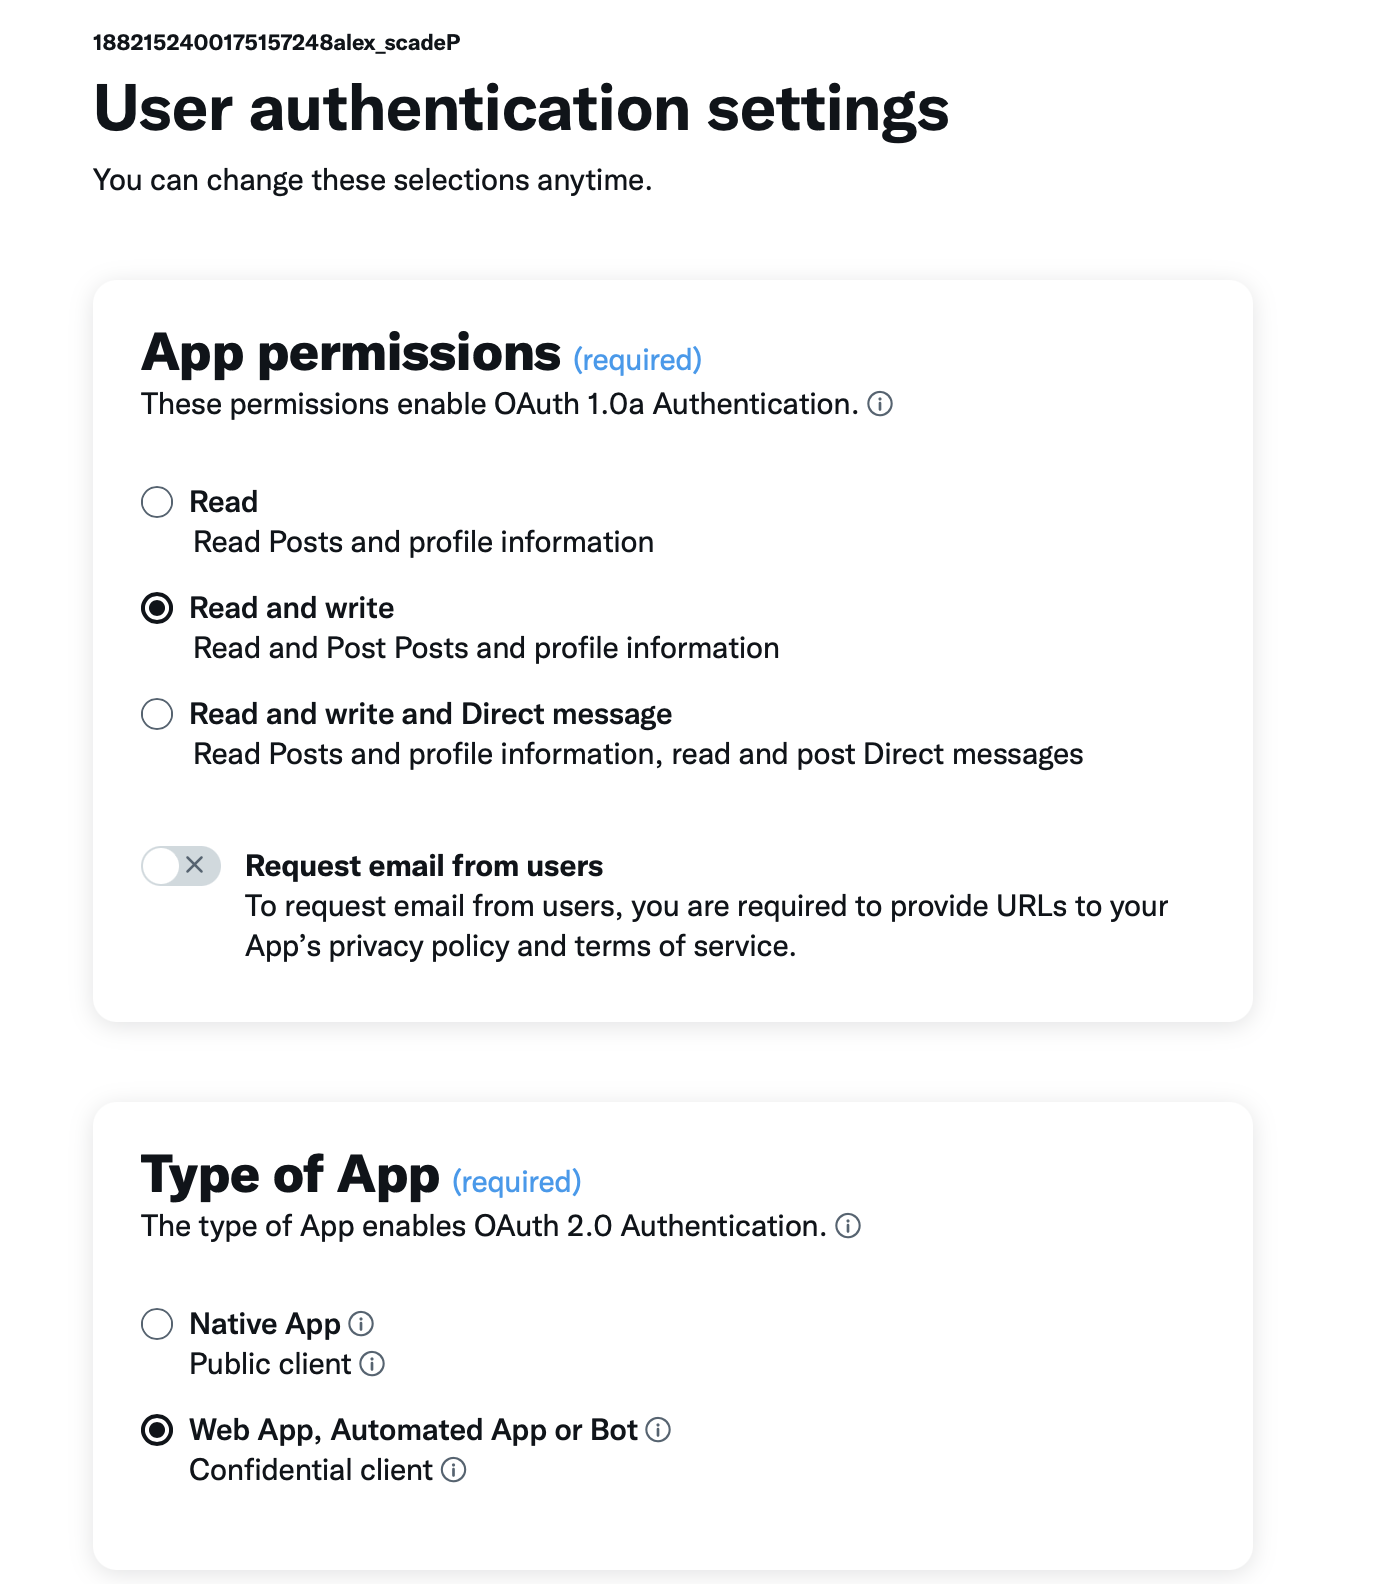
- In the User identification settings, configure it to have read and write permissions. And in Type of App choose Web app,Automated app or bot.
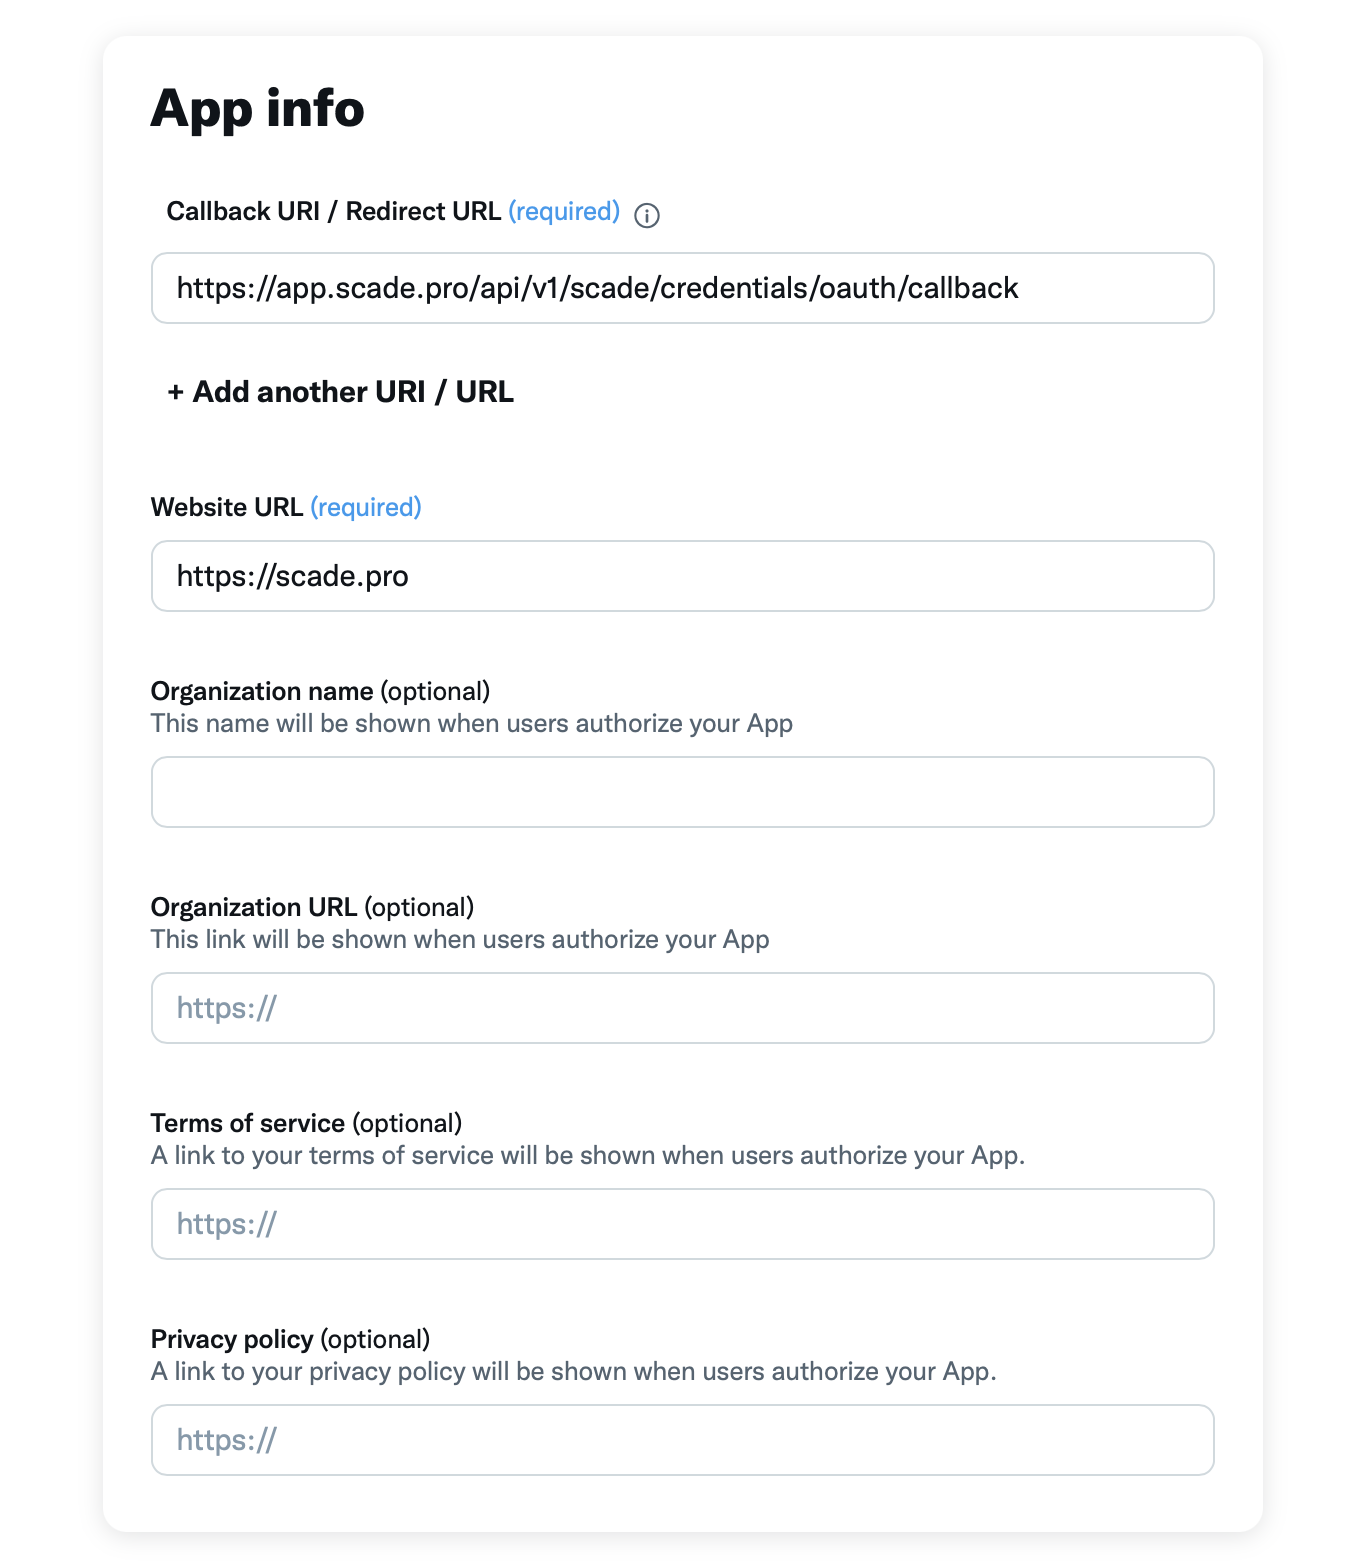
- Provide details such as the redirect URL (use a Scade callback URL https://app.scade.pro/api/v1/scade/credentials/oauth/callback) and website URL. Click Save.


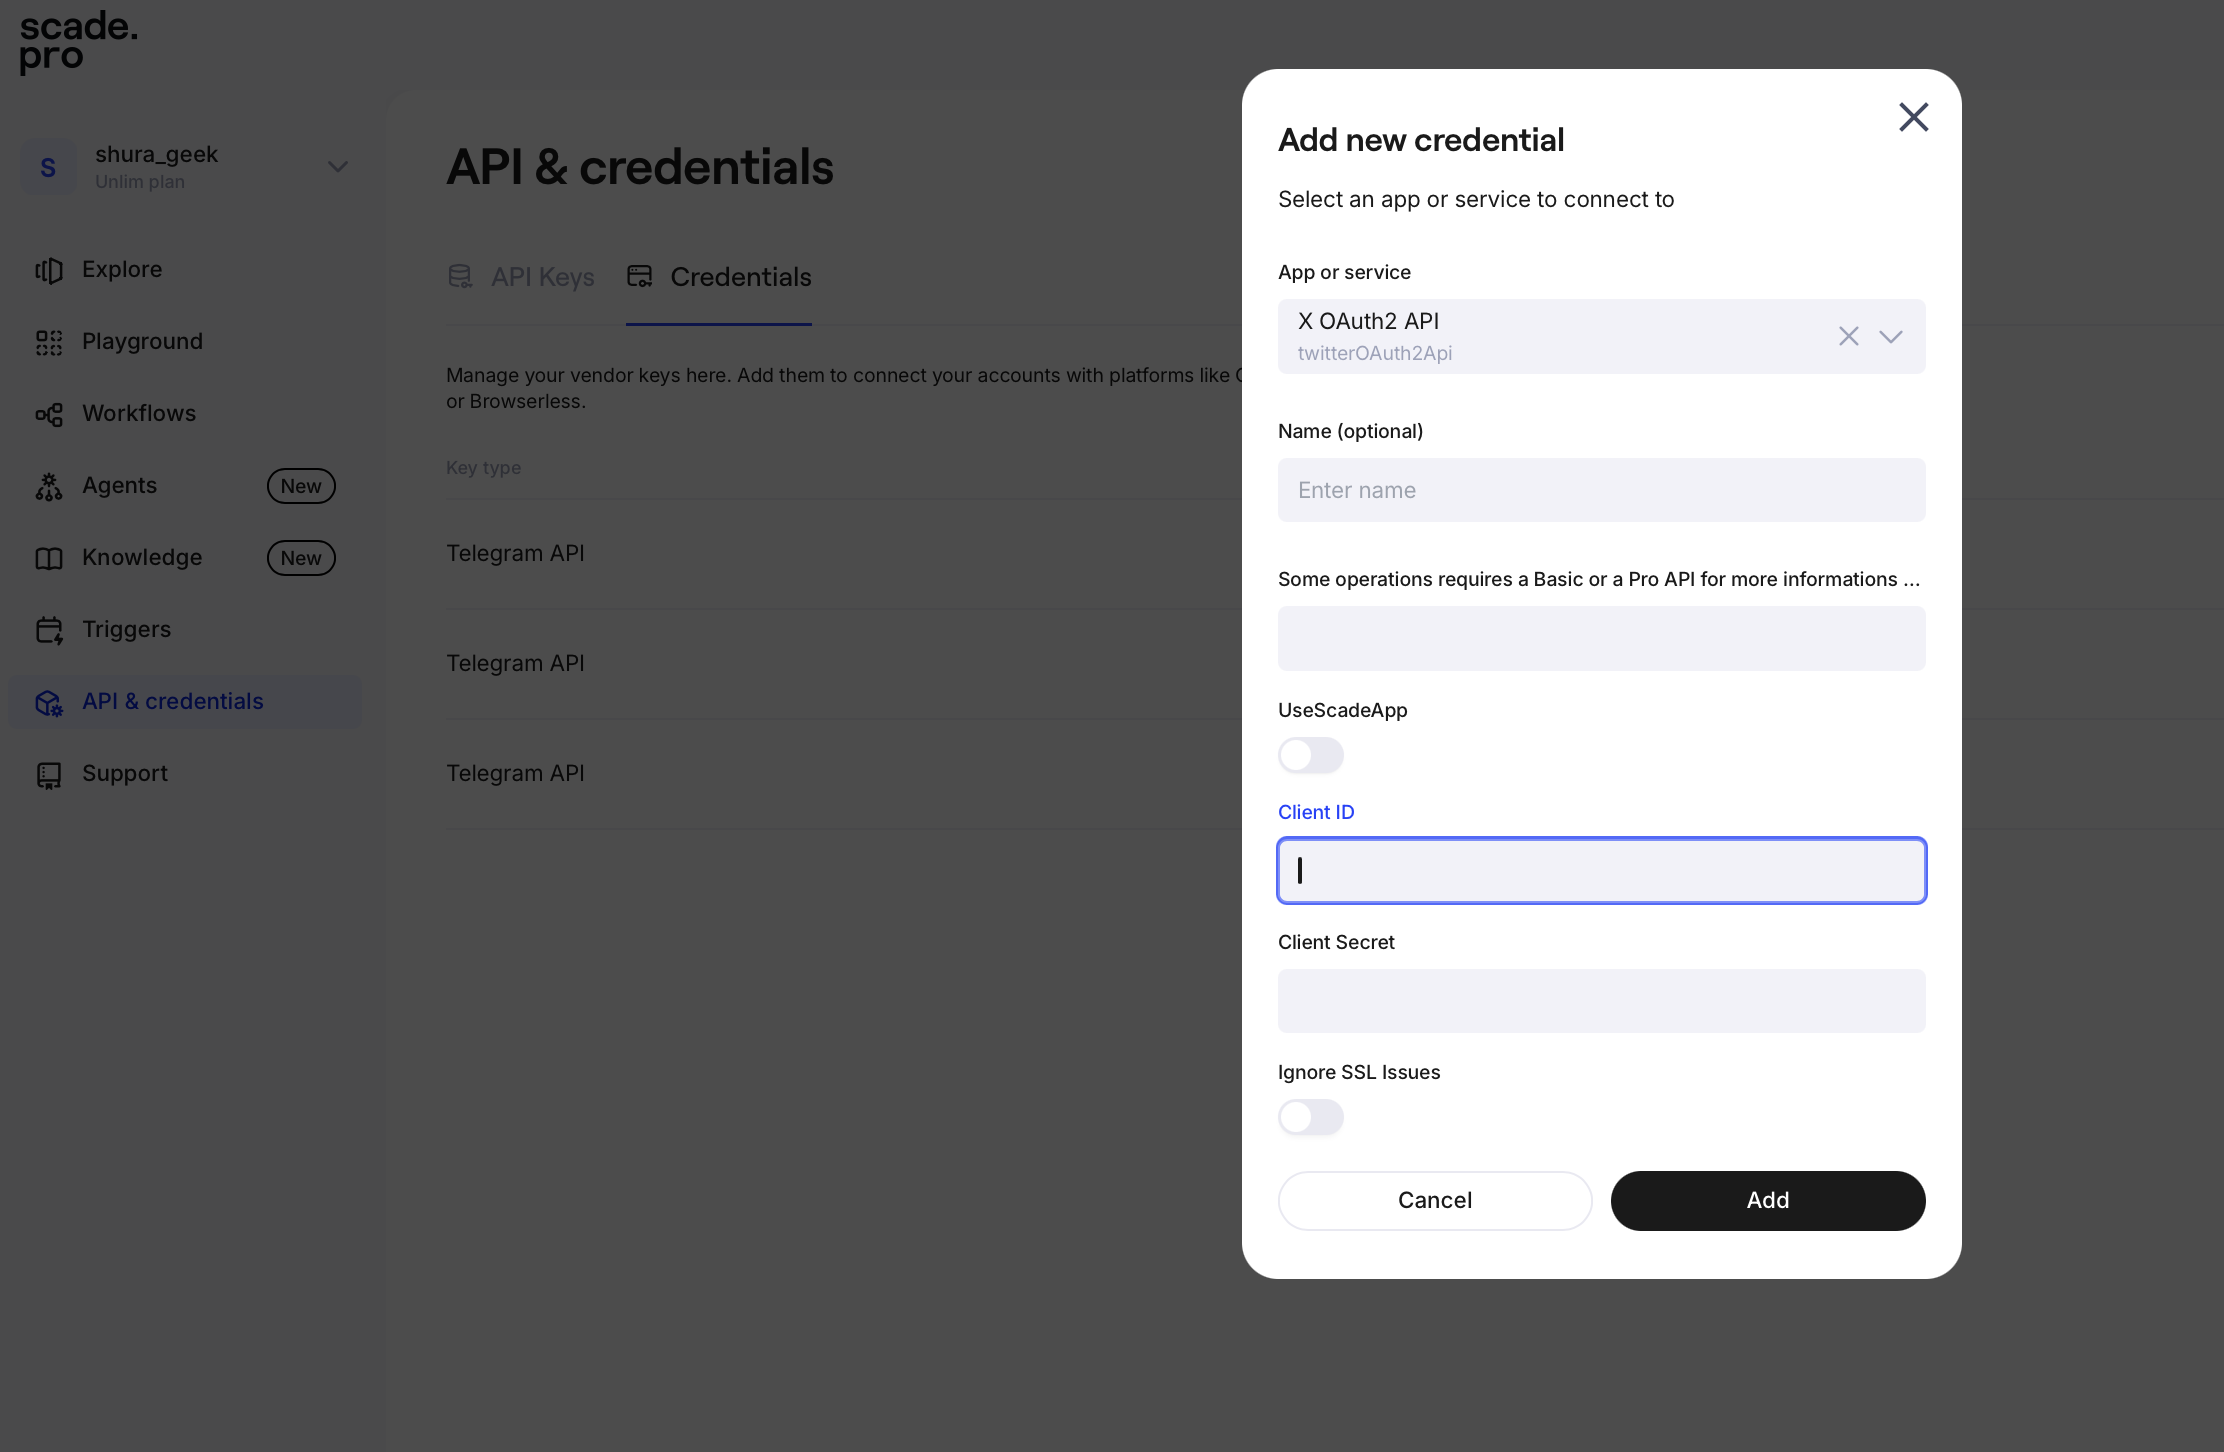
Step 10: Retrieve credentials
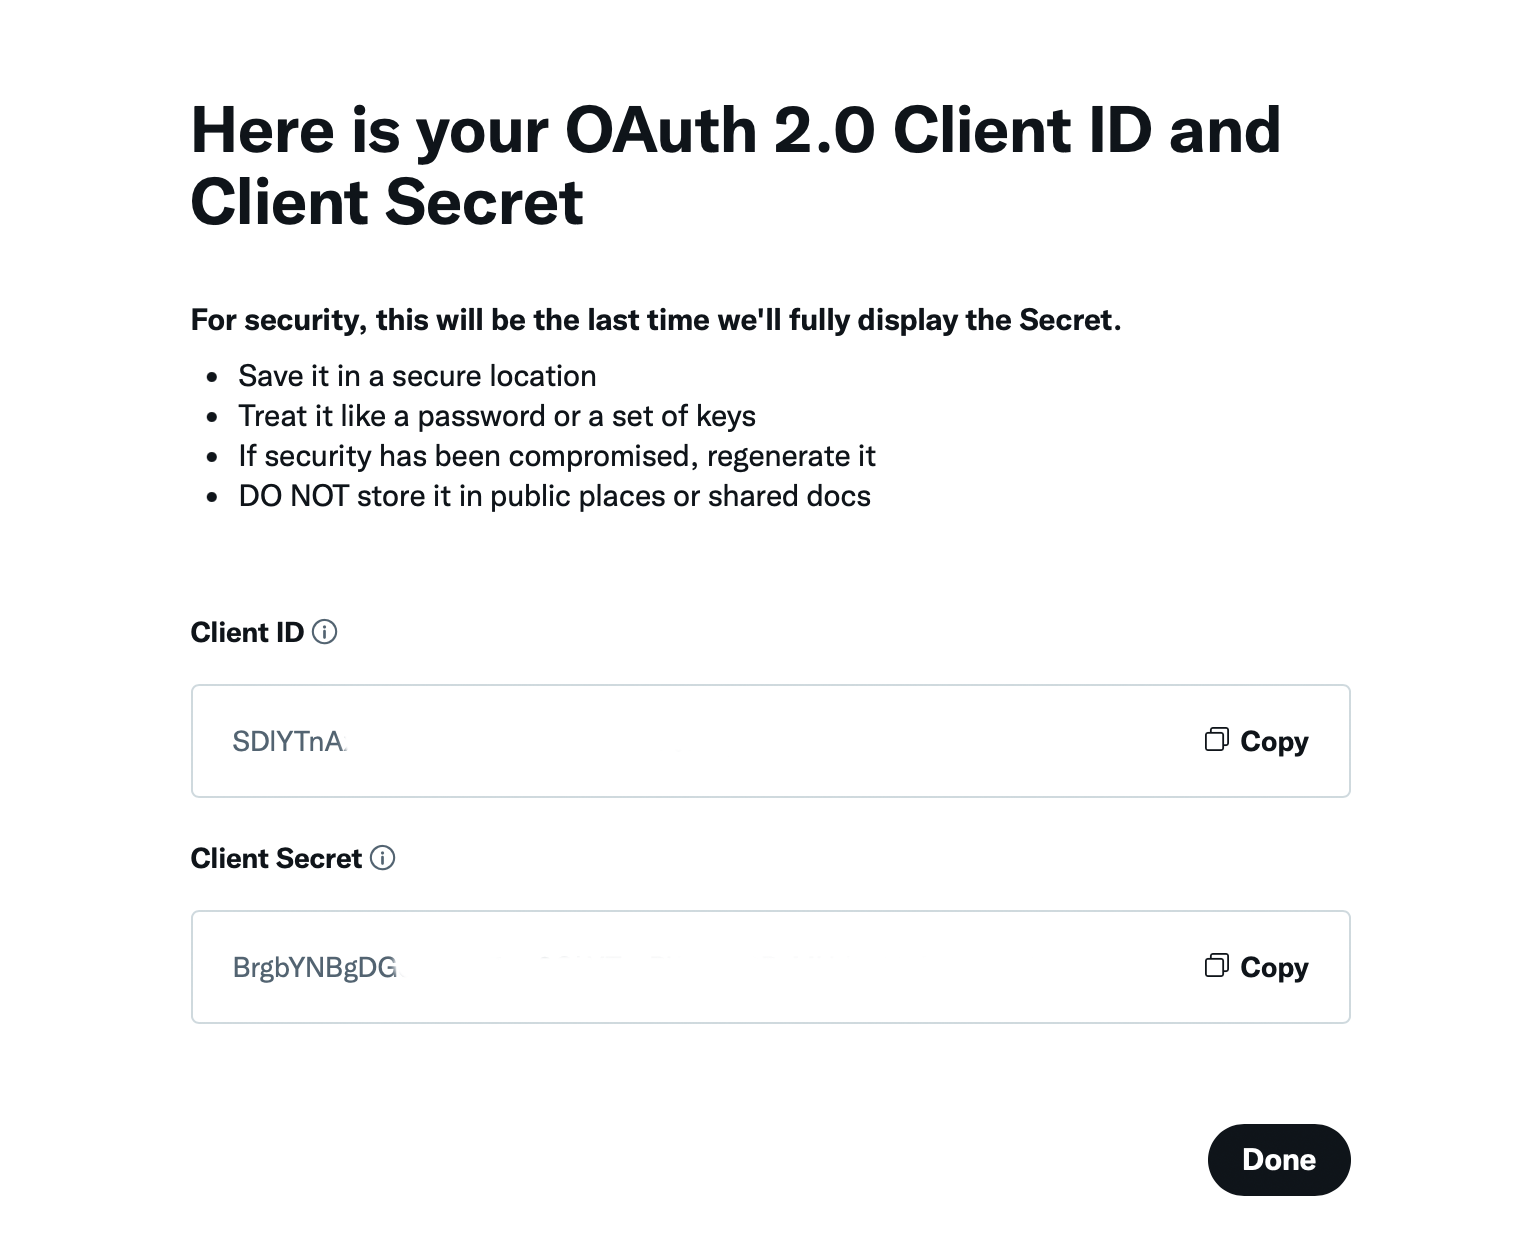
- Obtain the OAuth 2.0 client ID and client secret from Twitter, necessary for Scade credentials.
- Revisit Scade, Go to the API & Credentials section on the left menu. Click on the Credentials tab. Then click on “Add New” for credentials, and select the app authorization method (x authorization 2).
- Enter the client ID and client secret in the provided fields and name the credential if needed.
Your Twitter agent is now fully set up, capable of posting tweets automatically using the configured AI and tools.
You can communicate with your agent through chat, and set the tasks like posting tweets on a particular topic.
What if we could do even a better thing? What if we could search for news that are relevant to us and post about them on Twitter?
Remember, we’ve connected our agent at the beginning to the tool for the Google search. So every time we send that request, we’re going to be able to send that request to the Google search. The search will be done, and then it will post it on Twitter.
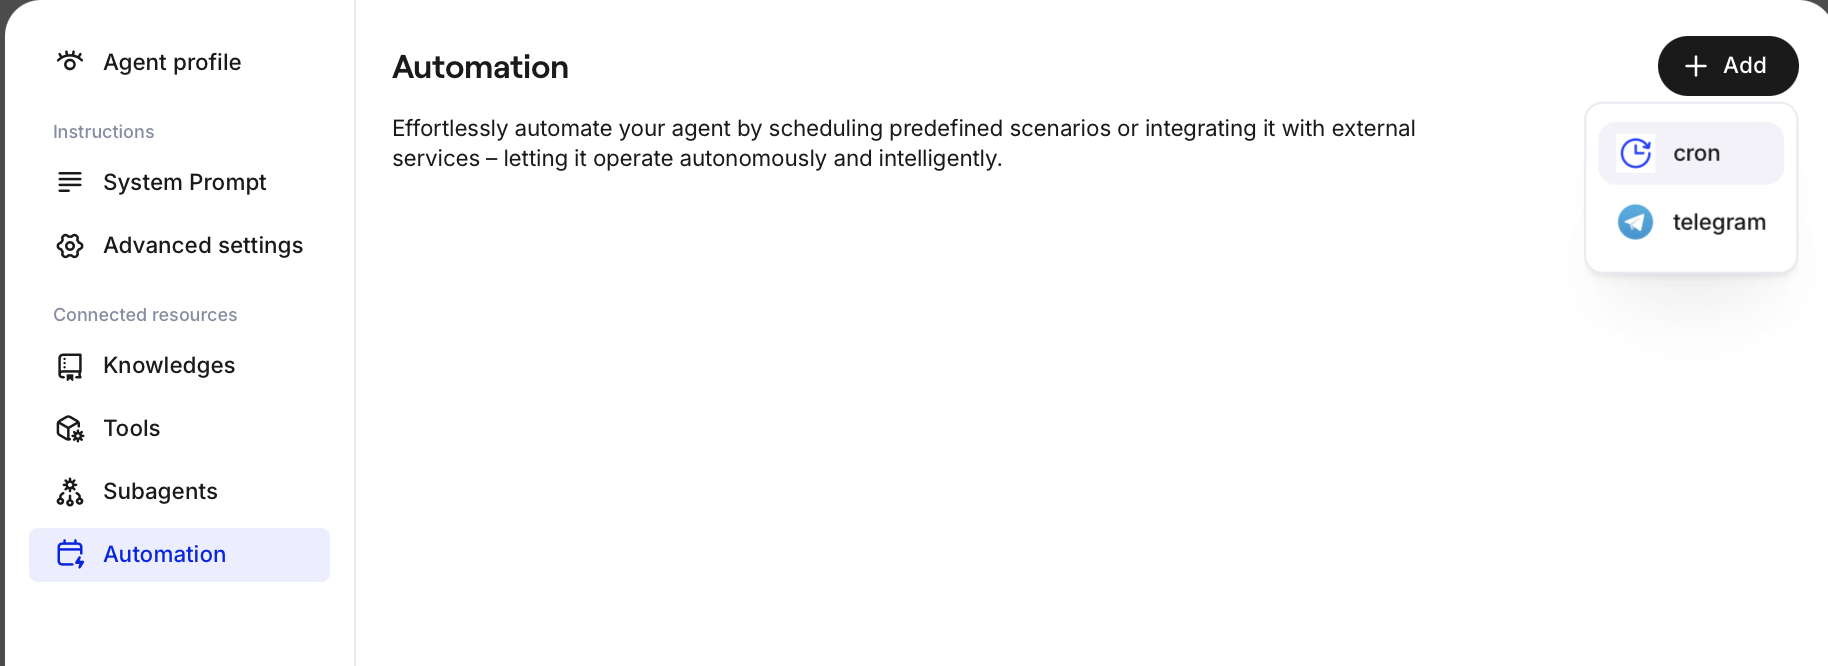
Step 11: Integrate news search and posting
-
Navigate back to the Agent menu and find the option to add a trigger.
-
Select the Cron trigger, which allows you to automate tasks based on a schedule.
-
Assign this trigger to your Twitter agent.
-
In the system message field, instruct the agent to “search online, create a Tweet, and post it.”
-
The Cron trigger will execute this task on a schedule. For instance, set it to search for relevant news, draft a Tweet, and post it every day at 9:00 AM.
-
Save the schedule, and your agent will now automatically search for news, draft Tweets, and publish them according to your set timing.

There you go. This is what the agents can do for you here. It’s just a simple live example of what you can build here with the Tweet agent that we’ve just done. There are a multitude of different use cases, and we are looking forward to you building some more.