Gemini is Google’s AI model suite, built for versatile tasks in language processing, summarization, visual understanding, and text analysis, delivering high performance across varied applications.
1. Gemini Model Variant
- gemini 1.5 flash: A fast and efficient model, great for quick tasks like summarizing text.
- gemini 1.5 pro: A powerful and versatile model, capable of complex tasks like writing different creative content.
- gemini 1.0 pro: A strong foundation model, offering a good balance of speed and capabilities.
- gemini pro vision: A model designed specifically for tasks involving images. This allows you to give it an image and ask it to provide insights or perform tasks based on visual information.
- text embedding 004: This is less of an assistant and more like a tool to understand the meaning of text by converting it into numerical representations. You wouldn’t use this for typical conversation but for things like finding similar documents or analyzing sentiment.
- aqa: Stands for “Answer Questions and Analyze.” It’s especially good for tasks that involve understanding and answering questions from text.
2. Prompt
- This is your instruction or question for the AI.
3. Temperature
- Controls the creativity (or randomness) of responses:
- Higher Temperature: More creative, experimental, and possibly less predictable.
- Lower Temperature: More conventional, concise, and adheres closely to your prompt.
4. Top P
- Fine-tunes how the AI chooses words:
- Lower Top P: The model tends to choose more commonly appearing words.
- Higher Top P: The model is more open to choosing less frequent words, potentially resulting in more unusual or less predictable outputs.
Key Points:
- Start Simple: Use a basic model like gemini 1.0 pro and focus on clear prompts.
- Don’t Be Afraid to Experiment: Play with different parameters (like temperature and top p) to see how they change the AI’s responses.
- Read the Documentation: The best way to understand the nuances of each parameter is to consult the official Gemini documentation.
How to use on Scade
Tutorial: Create a Marketing Summary and Feedback Analysis Flow Using Google Gemini Models
In this tutorial, we will create a flow to generate a marketing summary and perform feedback analysis using two Google Gemini nodes. Follow these steps:
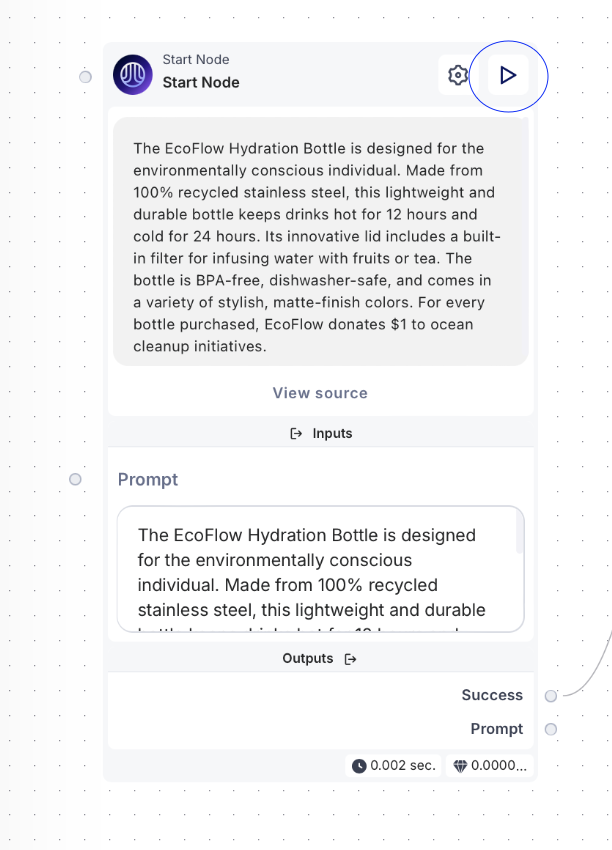
1. Start Node Setup
- Add a Text Input Field:
-
Add a text input field to the start node.
-
Use this field to input your product description.
-
Click the Play icon at the top-right corner of the start node to initialize it.
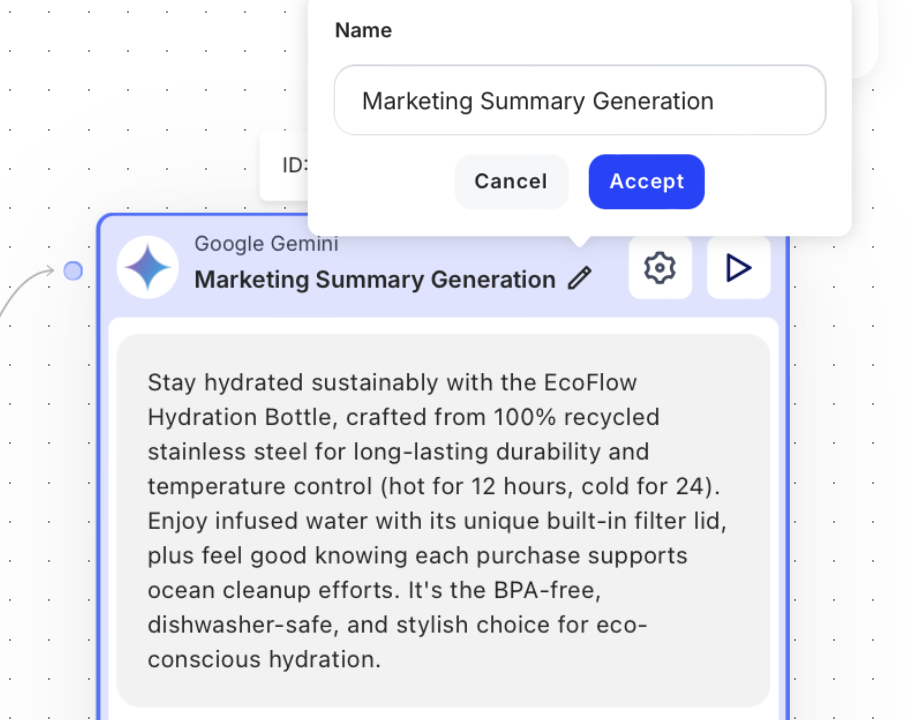
2. First Gemini Node: Marketing Summary Generation
- Add a Gemini Node:
- Drag and drop a Gemini node into the flow.

- Rename the Node:
-
Click the pen icon next to the node’s name.
-
Rename it to “Marketing Summary Generation” for clarity.
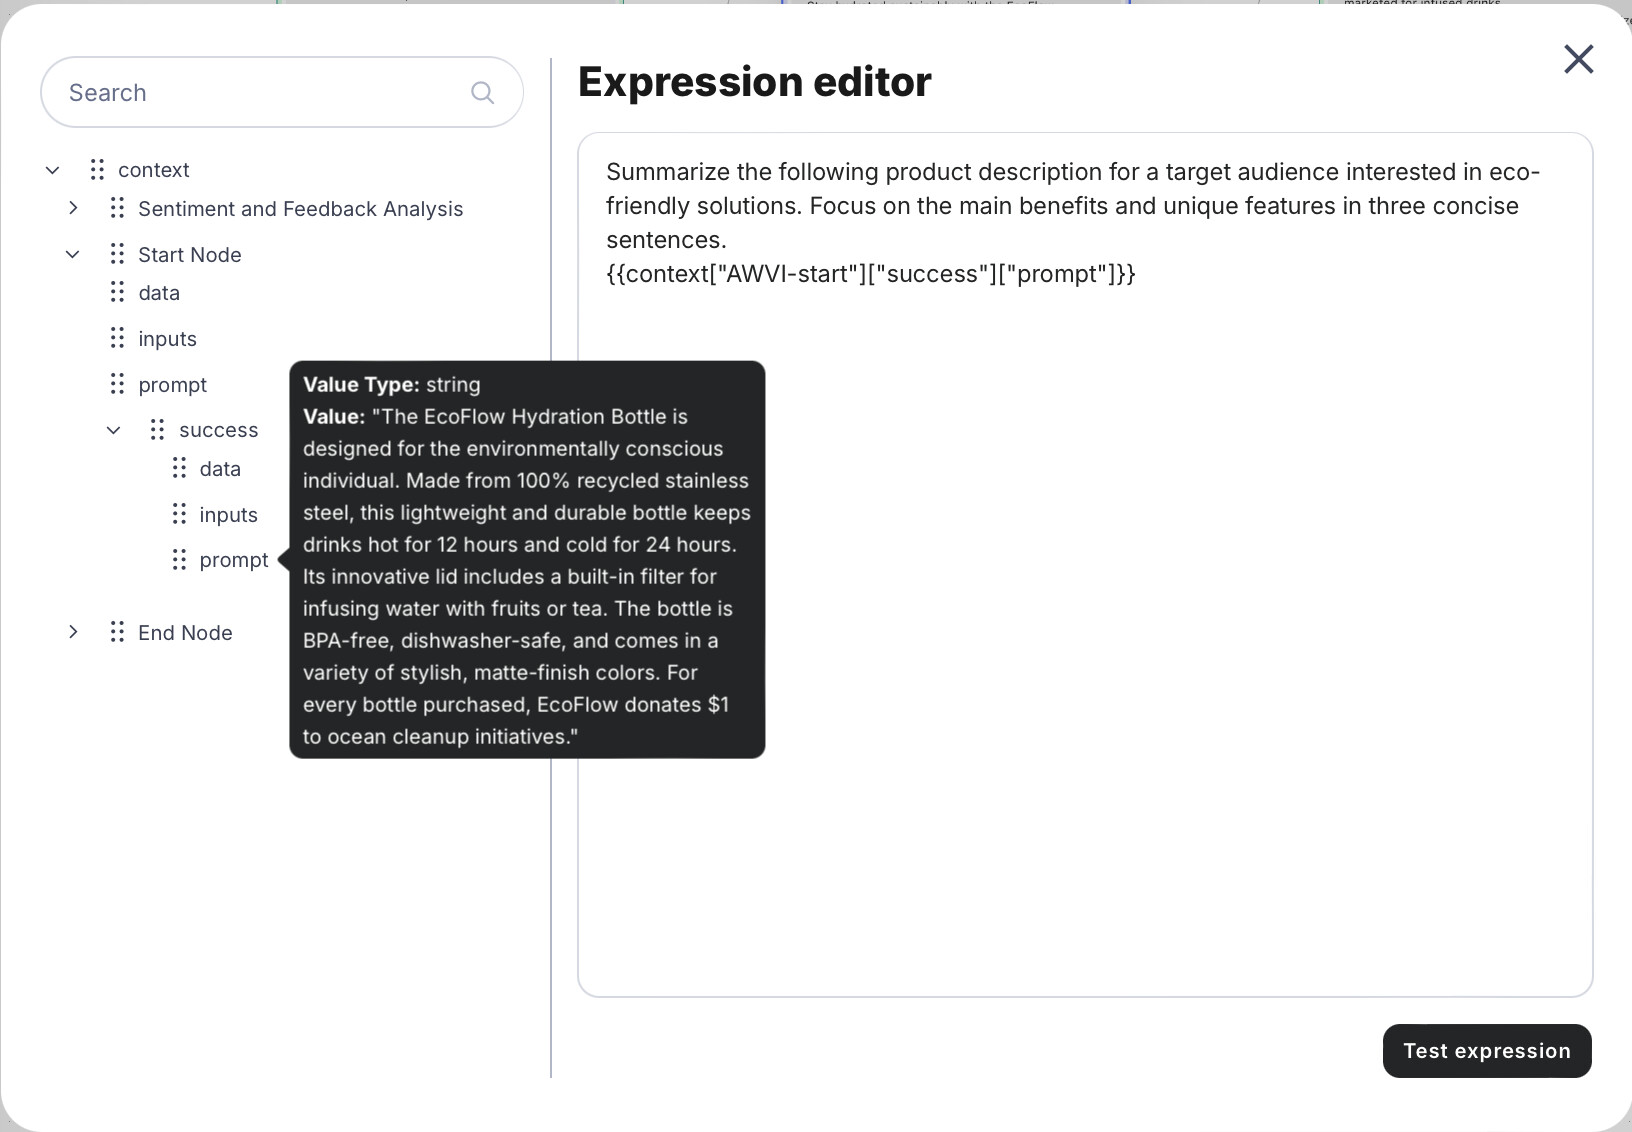
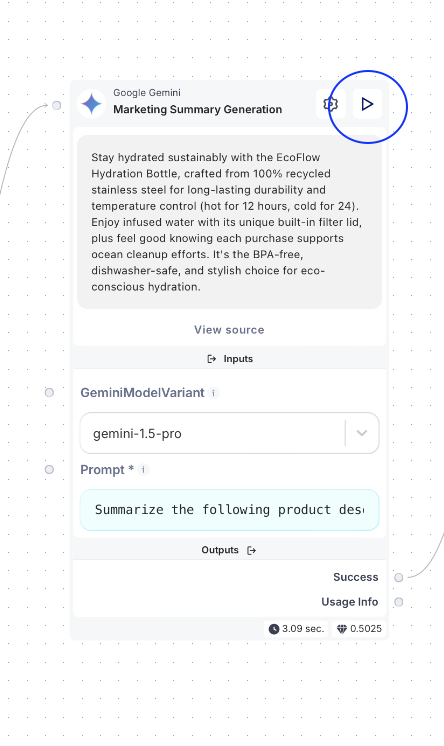
- Configure the Prompt:
-
In the node’s settings, change the Prompt Field Type to Expression.
-
Add the task:
“Summarize the following product description for a target audience interested in eco-friendly solutions. Focus on the main benefits and unique features in three concise sentences.”
- From the left menu, drag the success result (output) of the start node to the right side of the Gemini node. This connects the product description as input to the Gemini node.
- Start the Marketing Summary Generation node by clicking its Play icon.
3. Second Gemini Node: Sentiment and Feedback Analysis
- Add Another Gemini Node:
- Drag and drop a second Gemini node into the flow.
- Rename the Node:
- Click the pen icon and rename this node to “Sentiment and Feedback Analysis”.
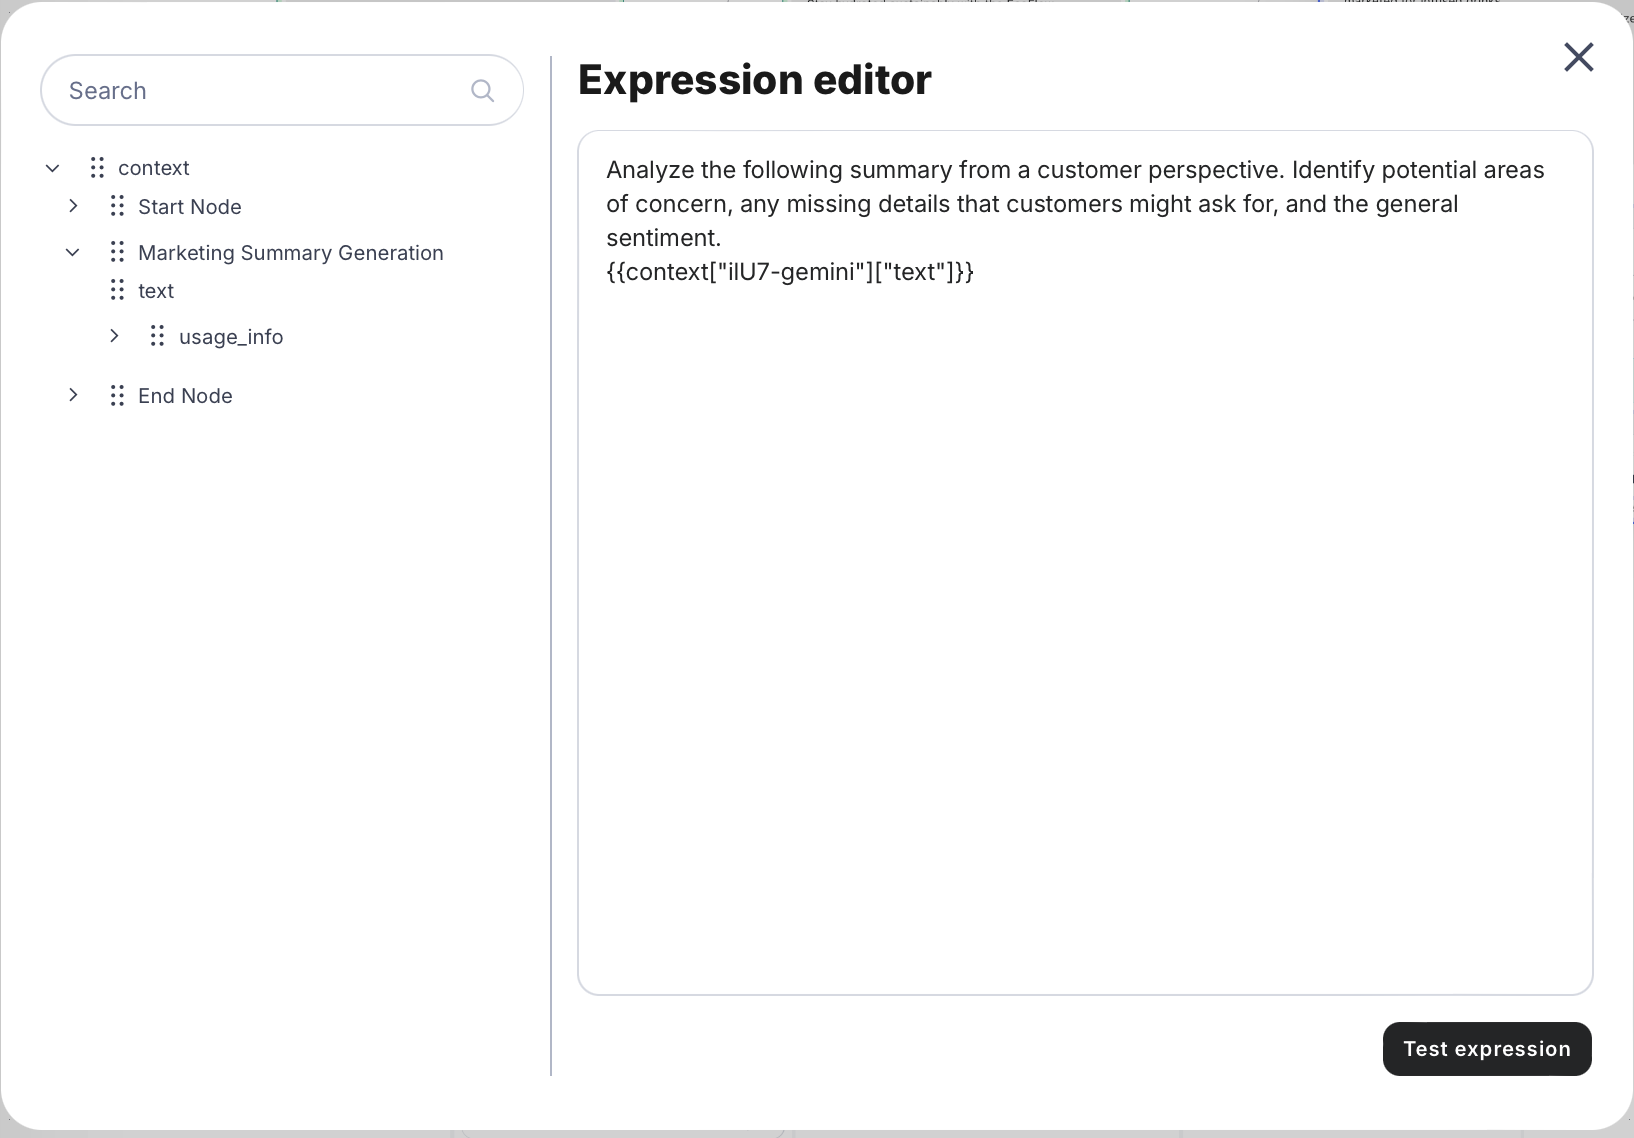
- Configure the Prompt:
-
In the settings, change the Prompt Field Type to Expression.
-
Add the task:
“Analyze the following summary from a customer perspective. Identify potential areas of concern, any missing details that customers might ask for, and the general sentiment.”
- From the left menu, drag the text (output) of the Marketing Summary node to the right side.
4. End Node Setup
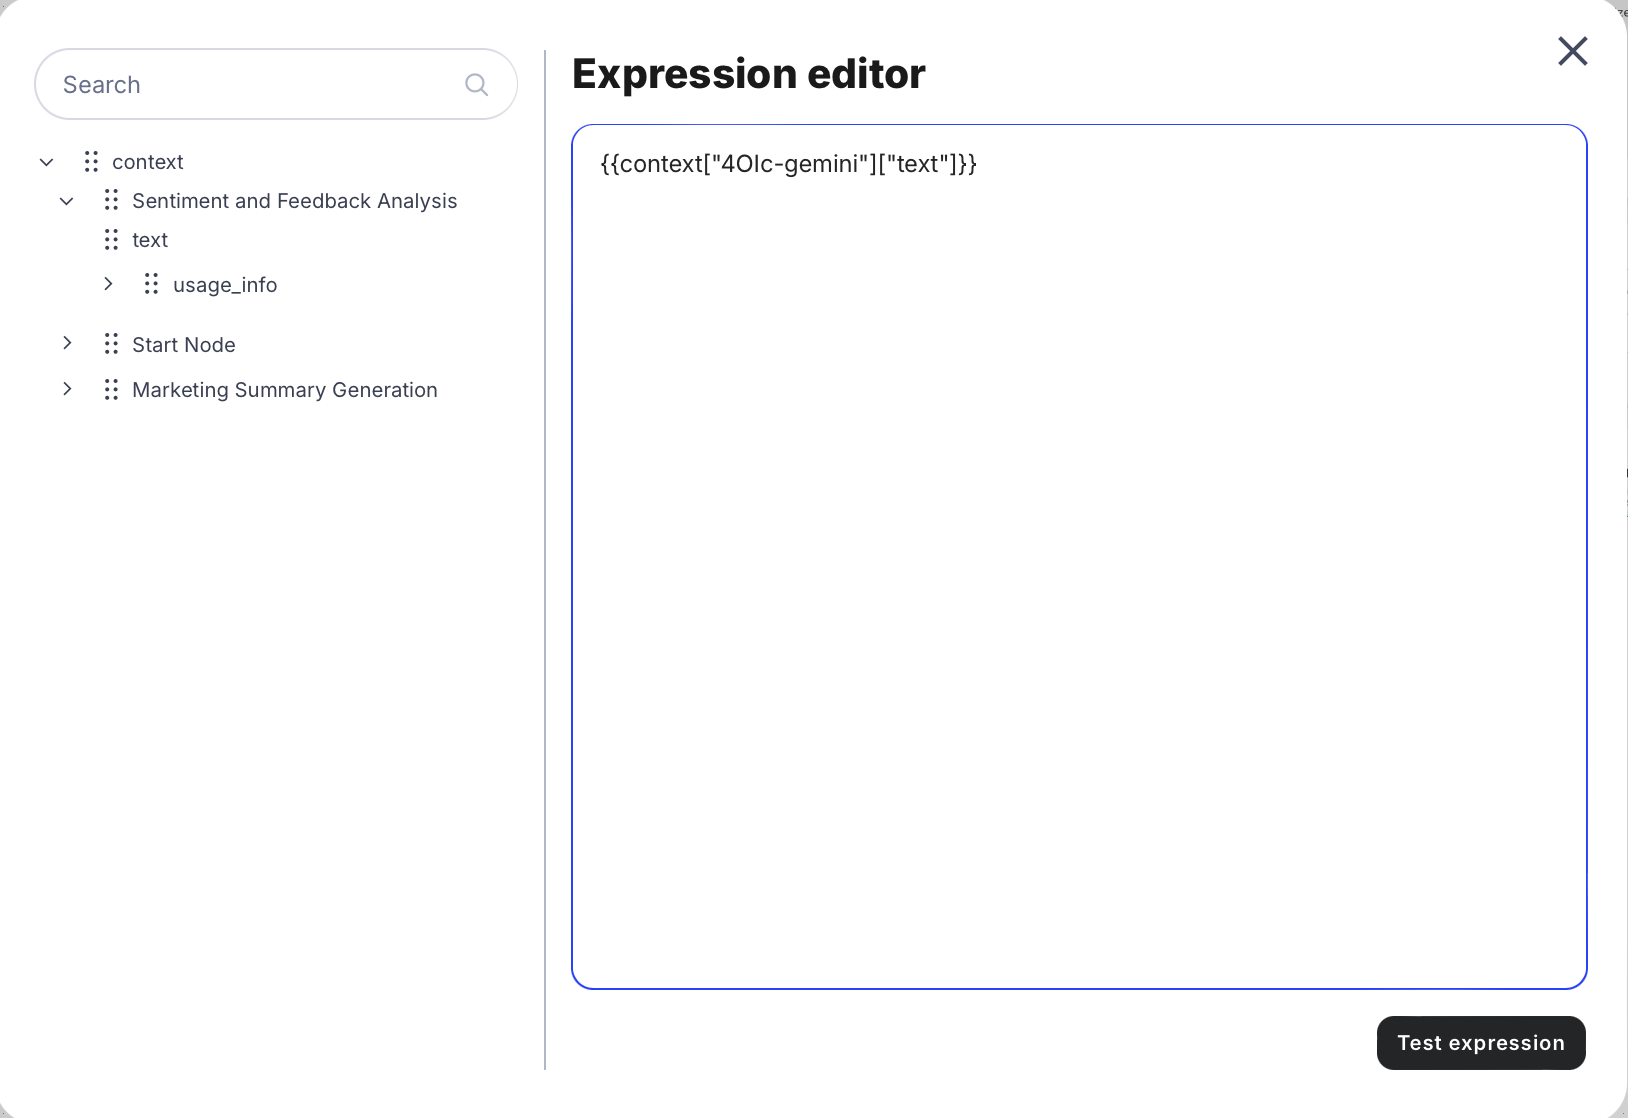
- Configure the End Node:
-
Add a result text field to the End node.
-
Change its type to Expression.
-
Connect the text result from the Sentiment and Feedback Analysis node to this result field.
5. Finalize and Test
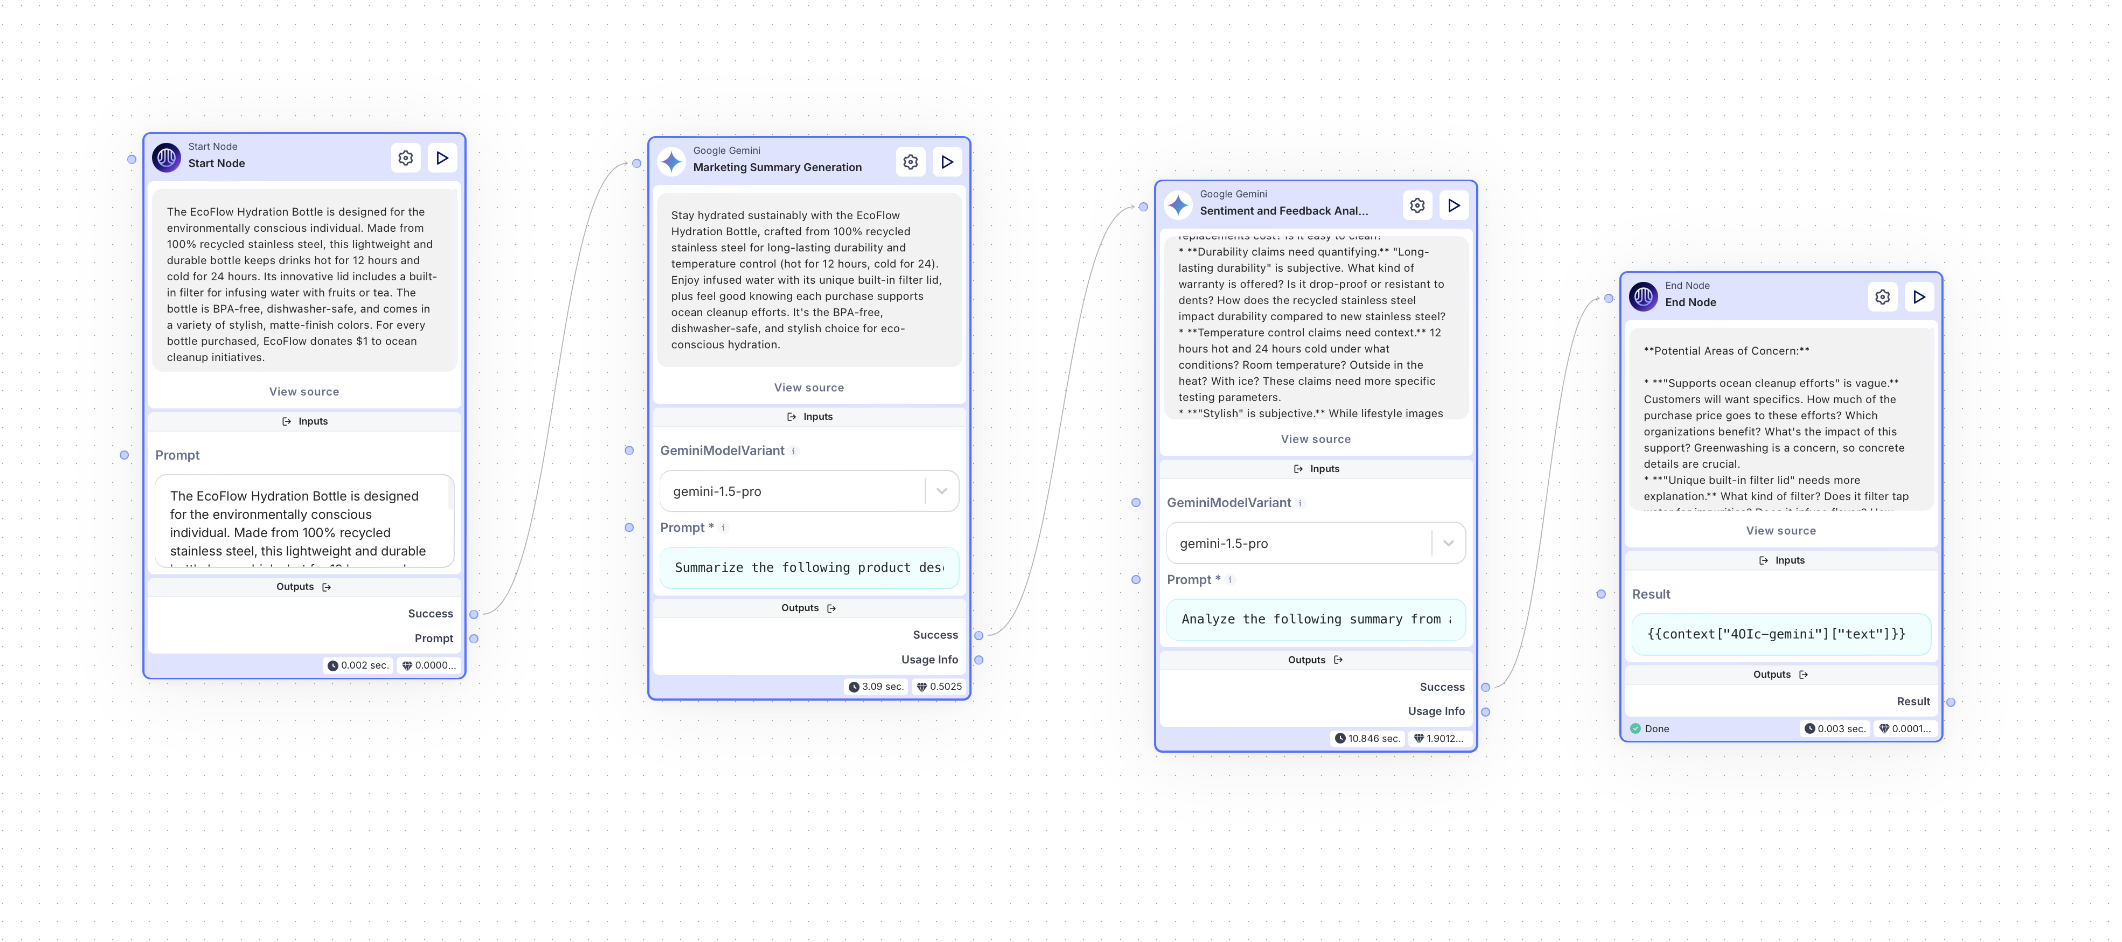
The flow is now fully set up and ready to use. Simply update the product description in the start node, then click Start the Flow at the top of the page to execute the entire flow.