Face-swap
A face swap AI model replaces a person’s face in an image with another’s, ensuring realistic alignment and seamless blending.
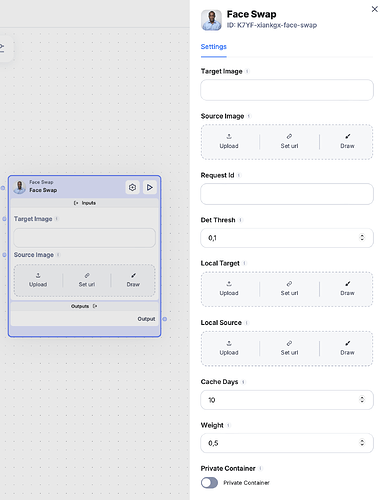
1. Target Image
• Target Image is the desired/base image where you want the face to be swapped. This is the image or video frame that contains the body and background, which remains intact, but the face will be replaced.
2. Source Image
• Source Image refers to the face you want to place onto the target image. This is typically your face or any other face you want to swap into the target image.
Example: If you want your face to replace someone else’s face in the target image, your photo would be the source image.
3. Request ID
• Request ID is a unique identifier for each API request. This allows you to track and manage individual face-swap operations, especially when running multiple jobs.
4. Det Thresh
• Det Thresh (Detection Threshold) is a threshold value that helps the model detect faces in the images. Lowering this value makes the model more sensitive, which might be useful when faces are partially obscured or difficult to detect. Increasing it might help avoid false positives when background elements are mistaken for faces.
5. Local Target
• Local Target refers to an option where the target image is provided locally (from your device or local server) instead of URL link or other remote storage method.
6. Local Source
• Local Source is the option where the source image is provided locally, similar to the local target. This means you can upload the image directly from your device for face-swapping, rather than from an external URL.
7. Cache Days
• Cache Days determines how long the processed images will be stored by the service. After the specified number of days, cached results will be deleted, ensuring temporary storage for privacy or performance reasons.
8. Weight
• Weight likely controls the intensity or strength of the face-swap blending. Adjusting this parameter allows fine-tuning of how seamlessly the source face integrates with the target image—whether you want the swap to be more subtle or strongly emphasized.
How to use in Scade
-
Let’s begin by configuring the Start Node for your flow:
-
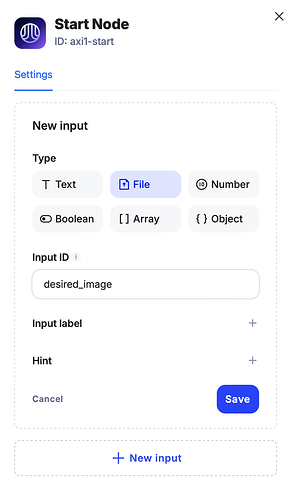
Configure Fields: Click on “Configure Fields” in the start node to set up the necessary inputs.
-
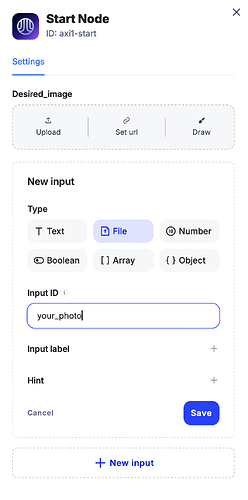
Add New Input: We’ll need to create two input fields:
• One for the desired image (the target image where the face will be swapped).
• Another for the face (the image that contains the face you want to add).
-
-
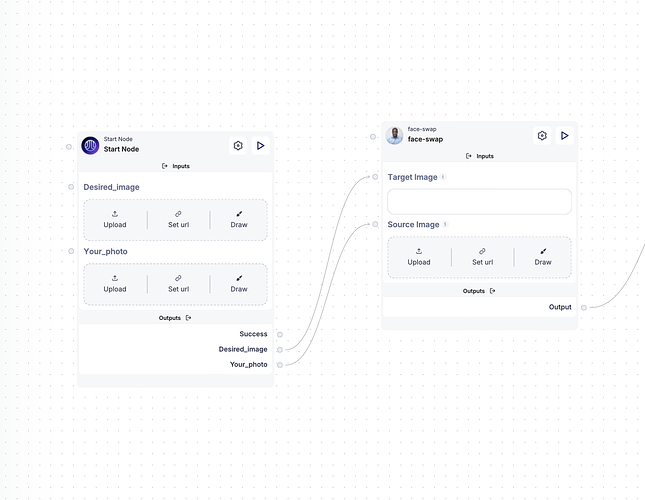
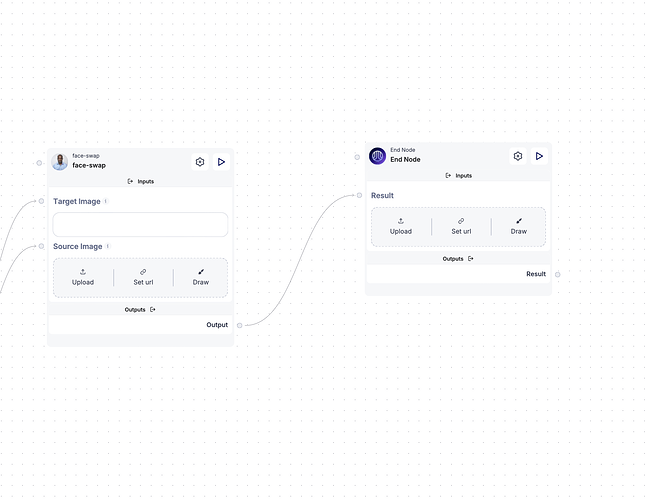
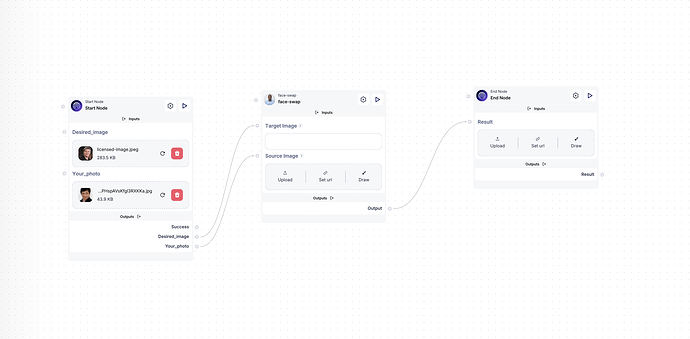
Connect Inputs:
• Link the desired image output to the Target Image parameter (this is the image where the face swap will occur).
• Link the your-photo output to the Source Image parameter (this is the face that will be placed onto the target image).
-
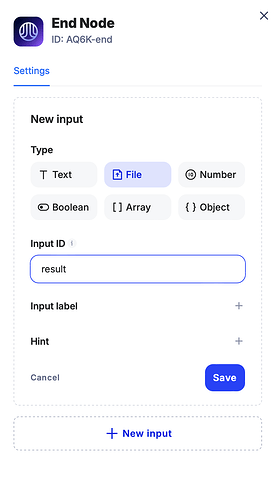
Create File Input in End Node:
• In the end node, create a file input field to store the resulting image.
• Connect the face-swap node output to this file input field, ensuring the result is properly saved.
-
Upload Your Photos:
• Upload the images: the desired image and the face you want to swap in.
-
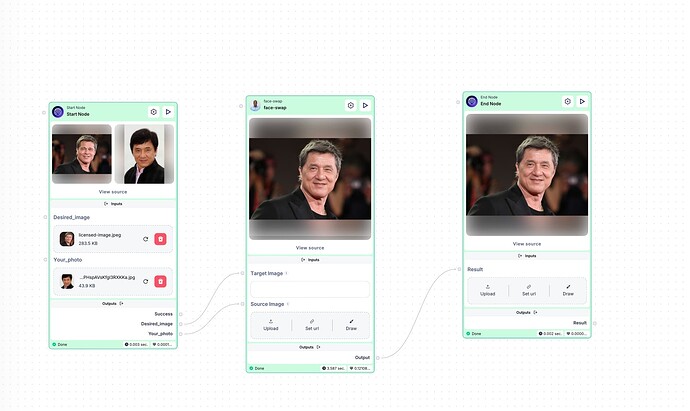
Start the Flow:
• Once everything is configured and connected, begin the flow by pressing “Start flow” blue button to execute the face-swap operation.
