[Bulk operations]. 3 Level of working with multiple files and entries

@Robert was asking for advice on how to handle multiple files. While we are waiting for the Core team to provide the much-anticipated feature, here is a list of workarounds to help you manage multiple files effectively.

Task

You have been given a list of YouTube links, and your goal is to provide a short summary of each video and create a comparison table.
The comparison will be between three different AR/VR glasses:

  1. XREAL Air Ultra 2
  2. VITURE One XR/AR Glasses
  3. Rokid Max

To make it easier to understand, I will present the methods in order of simplicity, starting with the easiest and progressing to the most interesting. This way, you can choose the method that best suits your needs.

6 Likes

Level 0 - Perplexity

You just drop all of your glasses titles into perplexity and ask it for a comparison table


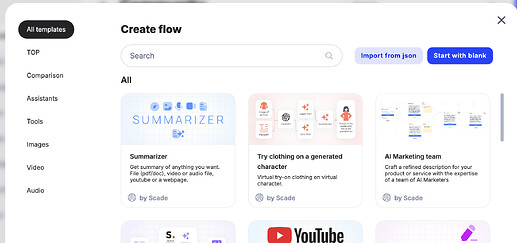
Create a flow

Step 1. Prompt

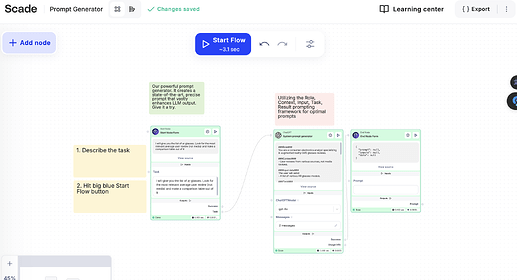
We start with a promptgen to prep a prompt for perplexity.

Simply use our well-made prompt-gen template and paste this input:

> i will give you the list of ar glasses. Look for the most relevant average user review (not media) and make a comparison table out of it

Also you can remove vaccination node from promptgen template.

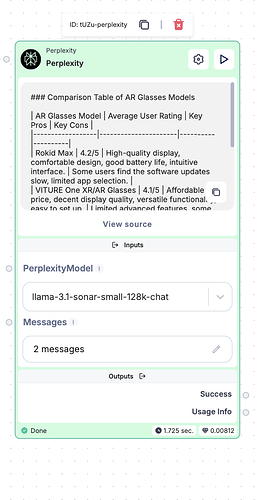
Step 2. Setup perplexity node

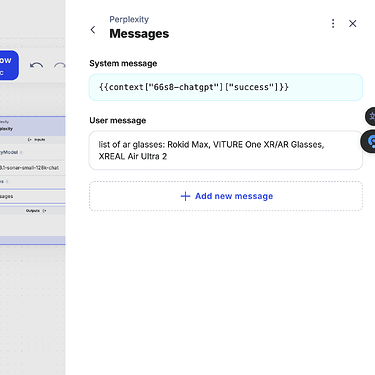
Create a new flow or use it right here. You can actually pass your brand new prompt right into the ppx prompt field.

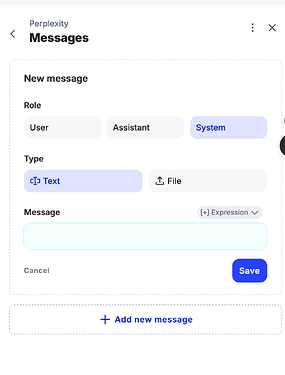
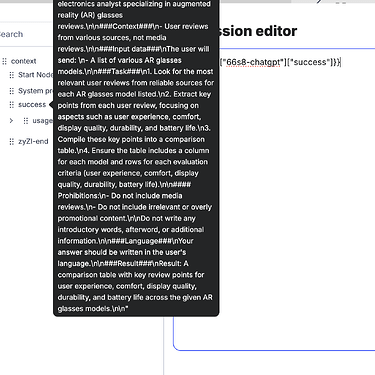
Just add a system message, convert this field into expression type and select pre-generated prompt. Don’t forget to run your prompt-gen, before adding perplexity, otherwise you won’t be able to see your variable with a prompt.


Result

Comparison Table of AR Glasses Models

AR Glasses Model Average User Rating Key Pros Key Cons
Rokid Max 4.2/5 High-quality display, comfortable design, good battery life, intuitive interface. Some users find the software updates slow, limited app selection.
VITURE One XR/AR Glasses 4.1/5 Affordable price, decent display quality, versatile functionality, easy to set up. Limited advanced features, some users report connectivity issues.
XREAL Air Ultra 2 4.5/5 Excellent display resolution, robust build quality, seamless AR experience, good customer support. Higher price point compared to competitors, occasional lag in performance.

Note:

The ratings and pros/cons listed are based on aggregated user reviews from various sources and may not reflect the full range of opinions on these products.

2 Likes

Level 0 - ChatGPT 4o

Same thing as with perplexity, except for the last node.
Here is a comparison table based on user reviews for the listed AR glasses with ChatGPT 4o:

AR Glasses Model Average User Review Rating Summary of User Feedback
Rokid Max 4.2/5 Users appreciate the comfortable design, clear visuals, and good battery life. Some users mentioned occasional software updates could improve functionality.
VITURE One XR/AR Glasses 4.0/5 Users like the immersive experience and lightweight design. However, there have been mentions of connectivity issues with certain devices.
XREAL Air Ultra 2 4.5/5 Highly rated for its clarity, wide field of view, and responsive customer support. A few users noted that it could be a bit pricey compared to other options.
3 Likes

Level 1: Use many inputs in start node

We will be analyzing list of youtube reviews. So let’s prep some URLs:

Rokid Max

Viture One

XReal

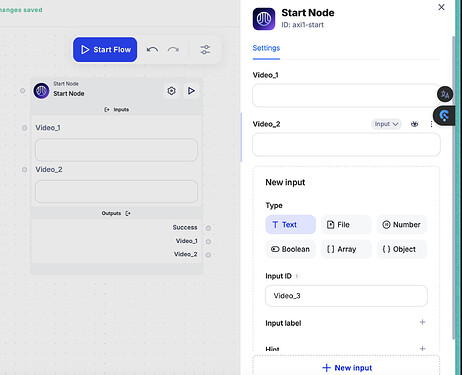
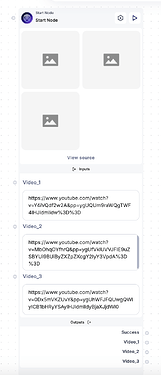
Step 1. Prep start node and paste our URLs

Double-click on start node and add input fields for your videos

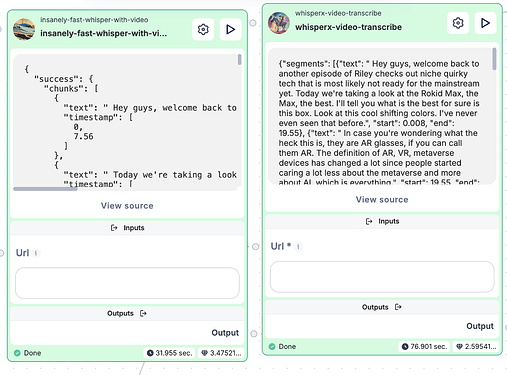
Step 2. Pick right transcribation node

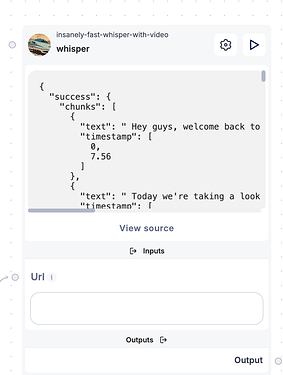
Let’s pick these 2 video whisper nodes and compare them side by side. One is a little more expensive, but x2 faster.


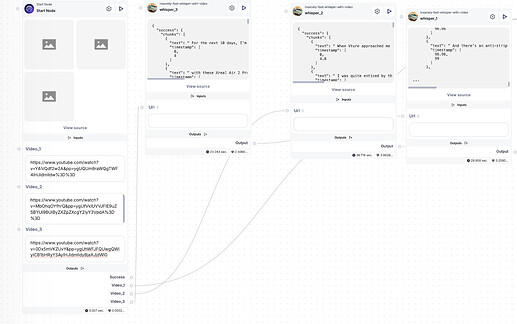
Step 3 - Duplicate this node for each input


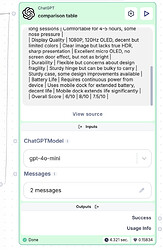
And generate a comparison table with a chatgpt node

###Role###
You are a consumer electronics analyst specializing in augmented reality (AR) glasses reviews.

###Context###
- User reviews from various sources, not media reviews.

###Input data###
The user will send: 
- A list of various AR glasses models.

###Task###
1. Look at these user reviews 
2. Extract key points from each user review, focusing on aspects such as user experience, comfort, display quality, durability, and battery life.
3. Compile these key points into a comparison table.
4. Ensure the table includes a column for each model and rows for each evaluation criteria (user experience, comfort, display quality, durability, battery life).
5. Assign a score

#### Prohibitions:
- Show only the table
- DO NOT explain yourself
- Do not include irrelevant or overly promotional content.

Do not write any introductory words, afterword, or additional information.

###Language###
Your answer should be written in the user's language.

###Result###
Result: A comparison table with key review points for user experience, comfort, display quality, durability, and battery life across the given AR glasses models, overall score

Result

Evaluation Criteria Rokid Max Xreal Air 2 Pro Vture One
User Experience Good AR potential, disappointing AR apps; 3DOF tracking Impressive for gaming; immersive 300-inch equivalent Clear, sharp image; needs stationary use
Comfort Light (75g) but can be uncomfortable after long use Very light (78g), comfortable for long sessions Comfortable for 4-5 hours, some nose pressure
Display Quality 1080P, 120Hz OLED, decent but limited colors Clear image but lacks true HDR, sharp presentation Excellent micro OLED, no screen door effect, but not as bright
Durability Flexible but concerns about design fragility Sturdy hinge but can be bulky to carry Sturdy case, some design improvements available
Battery Life Requires continuous power from device Uses mobile dock for extended battery, decent life Mobile dock extends life significantly
Overall Score 6/10 8/10 7.5/10
5 Likes

Level 2 - Subflow Cycle

In this tutorial, we’ll cover how to prepare a flow that processes an array of inputs, cycles through each item with a pre-defined subflow, and finally collects the results to analyze them using an LLM node. This is useful when you’re working with data that can be broken into chunks (like multiple YouTube videos or texts) and want to streamline the processing.

Let’s dive into the steps to get this up and running!


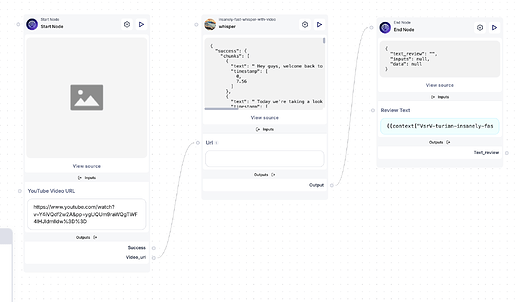
Step 1 - Prepare Sub-Workflow

Since we will be analyzing a YouTube video in this example, we’re going to use a powerful node called insanely-fast-whisper-with-video. This node is specifically designed for fast video transcription, making it ideal for our use case of extracting plain text from YouTube videos.

We’ll be passing a YouTube link into this node, which will automatically extract and return the plain text of the video’s audio. The goal is to ensure that our sub-workflow takes care of the transcription so we can process the text later.

Input Setup:

In the start node, we’ll create an input field to accept the YouTube URL. This allows us to dynamically feed different videos into the workflow without hardcoding anything.

Output Setup:

At the end node, we’ll specify an output where the extracted text will be stored. Once the text is extracted, we can pass it to other parts of the workflow or even use it in further analysis.

Helpful Tip:

Don’t worry about creating the node structure manually—I’ll attach a ready-made JSON file that you can import directly into your workflow, saving you time and ensuring all the nodes are set up correctly.


Step 2 - Setup the Main Flow

Now that we have our sub-workflow set up to process individual YouTube links, it’s time to configure the main flow that will handle multiple links. What we want to do is collect three URLs, pass them one by one to the sub-workflow for transcription, collect the results, and then analyze all the transcriptions using the LLM node.

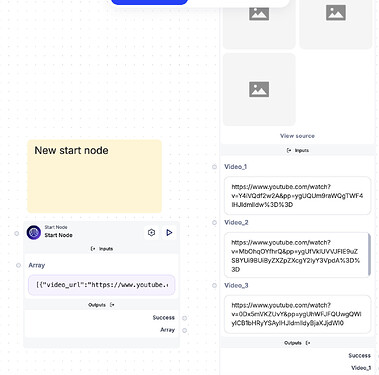
Here’s our start node:

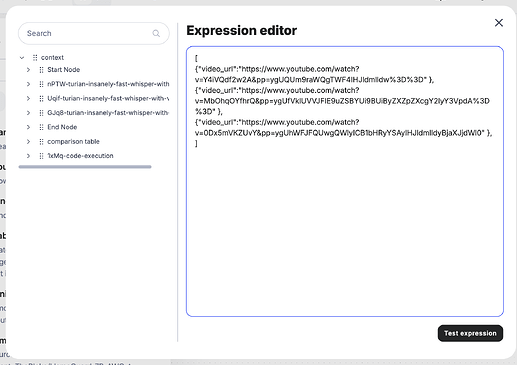
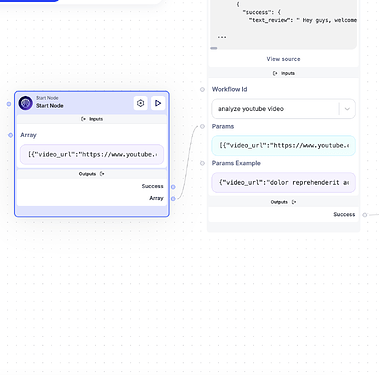
In this step, we’ll merge all three YouTube URLs into an array, which will then be cycled through our sub-workflow. The array needs to be in a format that the sub-workflow can recognize and process.

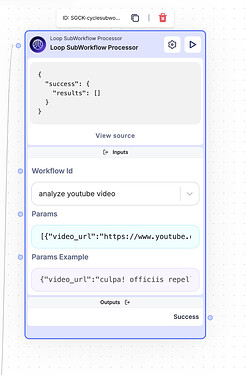
Tip:

To ensure the format is correct, you can run the sub-workflow node with a test URL and check the “Params Example” section. This will give you insight into how the array should be structured.

Example of URL Array in Params:

At this point, our sub-workflow is ready to handle each URL individually and extract the text.


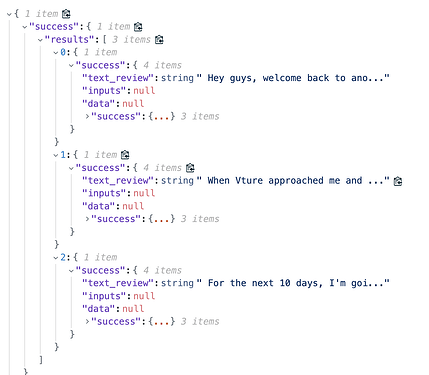
Step 3 - Test the Sub-Workflow

Before proceeding, it’s always a good idea to test your sub-workflow to ensure everything is functioning correctly. We need to make sure that the sub-workflow is able to process the YouTube links, extract the text, and store the results properly. If the workflow doesn’t behave as expected, this is where you’d want to troubleshoot the input/output configurations.

Here’s how my test setup looks:

Once we’ve confirmed that the sub-workflow is working as intended, we can move on to integrating it with the LLM node for deeper analysis.


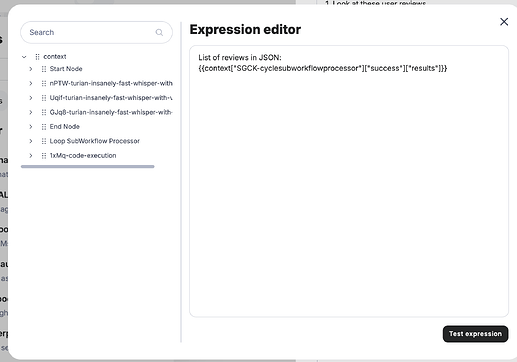
Step 4 - It Works! LLM Time

Now that our sub-workflow is processing the YouTube videos and extracting the text, it’s time to feed that text into the LLM node. We’ll do this to analyze the content in more detail. Since we’re dealing with large amounts of text, be sure to use a model capable of handling extensive input. For this, we’ll switch from a smaller model to GPT-4O, which can manage larger volumes of text more effectively.

You can simply drop the entire JSON result (containing the processed text) into the LLM node. GPT-4O will be able to interpret it correctly without any additional formatting.

Important:

Make sure to update the model selection from mini to gpt4o to handle the amount of text we’re working with.

Here’s an example where I’ve altered the prompt slightly in the second message:


Step 5 - Result

Evaluation Criteria Rokid Max VTUR1 Xreal Air 2 Pro
User Experience Clear view with diopter adjustment; good for device display mirroring but lacks compelling AR features. Score: 7/10 Comfortable and easy to set up; excellent virtual display, but some dizziness when not stationary. Score: 8/10 Highly immersive and enhances productivity; exceptional for entertainment. Score: 9/10
Comfort Light at 75g, but may look unconventional. Score: 6/10 Comfortable for 4-5 hours; slightly heavier but balanced. Score: 7/10 Highly comfortable and lightweight for extended use. Score: 9/10
Display Quality Micro OLED, 1080p, 120Hz with good colors. Score: 8/10 Micro OLED, very sharp image; smaller than advertised screen size. Score: 8/10 Huge virtual screen, highly immersive experience. Score: 9/10
Durability Thin build but flexible arms; lacks battery. Score: 6/10 Sturdy but hinges worry user; lacks battery. Score: 7/10 Durable and lightweight with no major issues mentioned. Score: 8/10
Battery Life Requires continuous power through USB-C. Score: 5/10 No internal battery, can use mobile dock for extended sessions. Score: 6/10 Requires external power but offers compatible connections. Score: 7/10
Total Score 32/50 36/50 42/50
4 Likes

Pretty long story here. Thanks! And where can I get the flow file? And how to use it? @nik

2 Likes

Fair point!
Here are the files.

Now how to use it.

Step 1 - Create new flow → Import from JSON


Add both of these files. Now go to main flow and

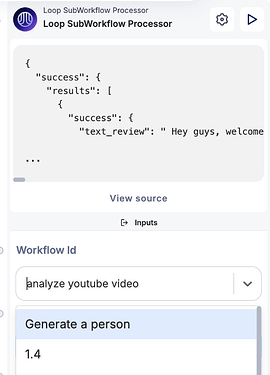
Step 2 - Select Sub-flow in this node

5 Likes

Cool beans and stuff. It seems like you guys should have a way simplier way to manage multiple files.

It’s weird that there is an array type of field, but i didn’t get on how to use it here

3 Likes

@JennaTX

True story. We are continuously working on improving our UX and the overall App Builder interface to make it more intuitive and user-friendly. We’re getting there, but there’s always room for improvement!

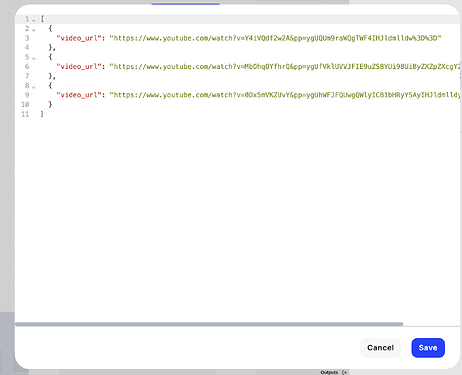
And yes, you’re absolutely right—there is an input type specifically for arrays. If you’re already comfortable with how arrays work, you can easily prepare the correct array yourself and directly input it into the Params field within the Subworkflow node. This way, you can have more control over what gets passed into the workflow without needing additional nodes to structure the data for you.

Here’s how it looks when you pass the array directly into the Params field:

In this case, I’ve manually inputted the array into the field. This approach allows you to customize your array entries more easily, especially when you already know the specific format the Subworkflow node requires.

Once you pass the array in, the Subworkflow node can immediately start processing the items as it cycles through the array, no additional steps needed.

This method is great for simplifying your workflow, especially when you’re comfortable structuring the array data manually. If you ever want to automate the array generation or handle more complex data sets, you can always add more steps to your workflow, but this is a solid approach for quick-and-dirty runs!

4 Likes

Preparing the most interesting part…
But for this I need your vote on what should be the 3rd way of dealing with MANY entries for analysis.

  • Google Sheets
  • Apple Numbers (local)
  • Airtable
  • MS Excel (local)
  • Notion DB
0 voters
2 Likes

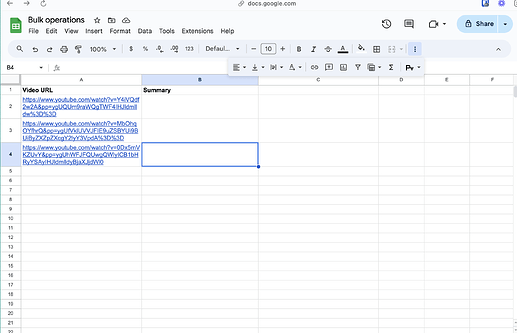
Level 3 - Google Sheet for bulk run your Flow

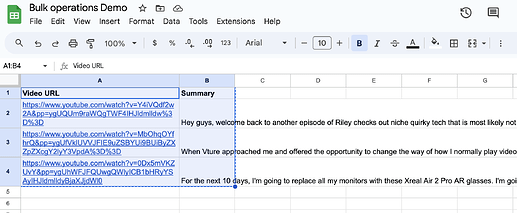
We will be running your flow for each row in A column containing the data (url).

  • There will be some code, but you can copy-paste-it
  • It is highly required to understand what is API request and why do we need it

Ok, so let’s dig into Google Sheets x Scade option.
Attention, so far there is no native integration and a pretty haptic API requests management.

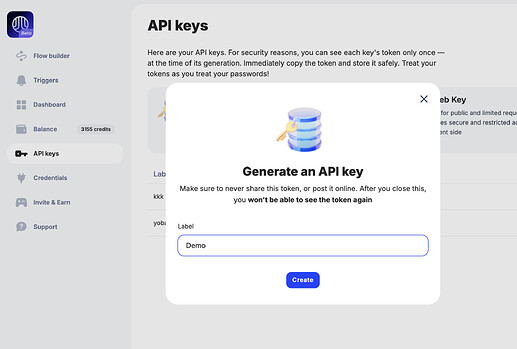
Step 1 - Create your server API key

Go to API keys page and create new Server Key

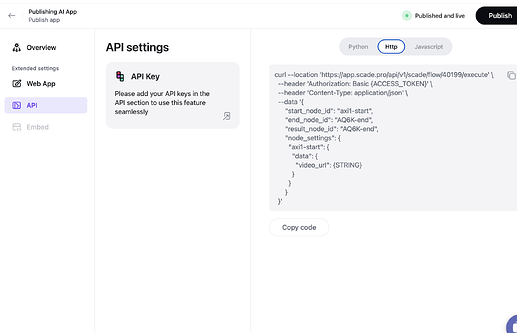
Step 2 - Copy your Flow HTTP request

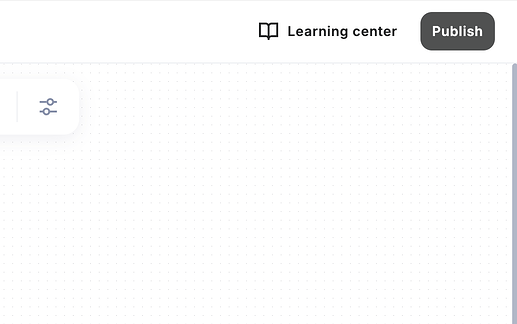
Open your flow, click publish

Click on API in Extended settings sidebar

Step 4 - Create your Google Sheet

Let’s create a sample sheet and fill it with our URls

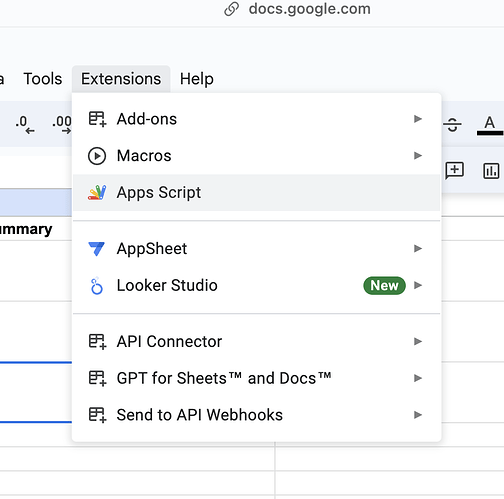
Step 5 - Open App Script

It lives in Extensions → App Script

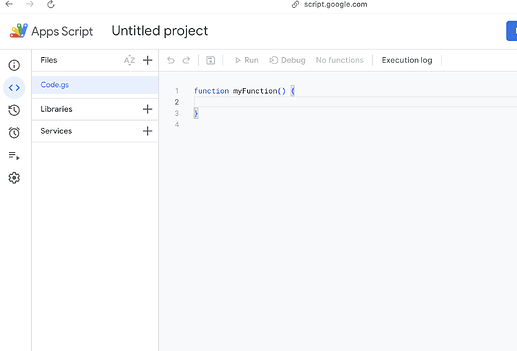
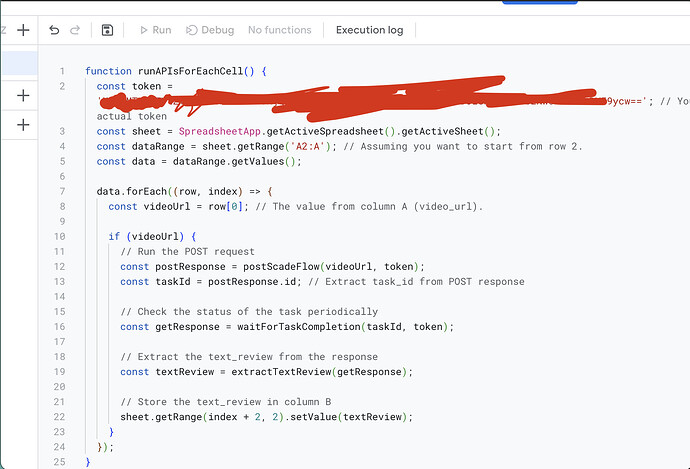
Step 6 - Rename your script and paste this code

The Code you need to copy
function runAPIsForEachCell() {
  const token = 'XXXXXXXXXXXXX'; // Your actual token
  const sheet = SpreadsheetApp.getActiveSpreadsheet().getActiveSheet();
  const dataRange = sheet.getRange('A2:A'); // Assuming you want to start from row 2.
  const data = dataRange.getValues();

  data.forEach((row, index) => {
    const videoUrl = row[0]; // The value from column A (video_url).

    if (videoUrl) {
      // Run the POST request
      const postResponse = postScadeFlow(videoUrl, token);
      const taskId = postResponse.id; // Extract task_id from POST response
      
      // Check the status of the task periodically
      const getResponse = waitForTaskCompletion(taskId, token);
      
      // Extract the text_review from the response
      const textReview = extractTextReview(getResponse);
      
      // Store the text_review in column B
      sheet.getRange(index + 2, 2).setValue(textReview);
    }
  });
}

function postScadeFlow(videoUrl, token) {
  const url = 'https://app.scade.pro/api/v1/scade/flow/40199/execute';
  const payload = {
    "start_node_id": "axi1-start",
    "end_node_id": "AQ6K-end",
    "result_node_id": "AQ6K-end",
    "node_settings": {
      "axi1-start": {
        "data": {
          "video_url": videoUrl
        }
      }
    }
  };

  const options = {
    method: 'post',
    contentType: 'application/json',
    headers: {
      'Authorization': `Basic ${token}`,
      'Content-Type': 'application/json'
    },
    payload: JSON.stringify(payload)
  };

  const response = UrlFetchApp.fetch(url, options);
  return JSON.parse(response.getContentText()); // Returning the POST response
}

function waitForTaskCompletion(taskId, token) {
  const url = `https://api.scade.pro/api/v1/task/${taskId}`;
  const options = {
    method: 'get',
    headers: {
      'Authorization': `Basic ${token}`,
      'Content-Type': 'application/json'
    }
  };
  
  let isCompleted = false;
  let response;
  
  // Check task status every 5 seconds for up to 2 minutes (adjust as necessary)
  for (let i = 0; i < 100; i++) {  // 24 attempts, 5 seconds each = 2 minutes max
    Utilities.sleep(5000); // Wait for 5 seconds before checking the status again
    response = UrlFetchApp.fetch(url, options);
    const taskStatus = JSON.parse(response.getContentText());
    
    // Check if the task has been completed
    if (taskStatus.status === 'completed' || taskStatus.state === 'done' || taskStatus.result) {
      isCompleted = true;
      break;
    }
  }
  
  return JSON.parse(response.getContentText()); // Return the final GET response when completed
}

function extractTextReview(response) {
  // Navigate the response to find the text_review
  try {
    const textReview = response.result.success.text_review;
    // Clean up any unwanted characters if needed
    return textReview.replace(/\\n/g, ' ').trim();
  } catch (e) {
    return 'No text_review found';
  }
}

Step 7 - Paste your Server Token

Step 8 - Save and run!


image

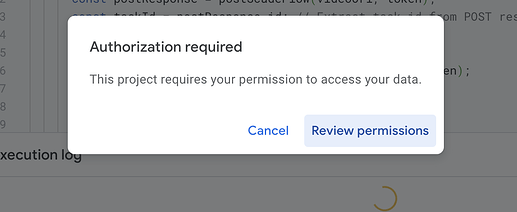
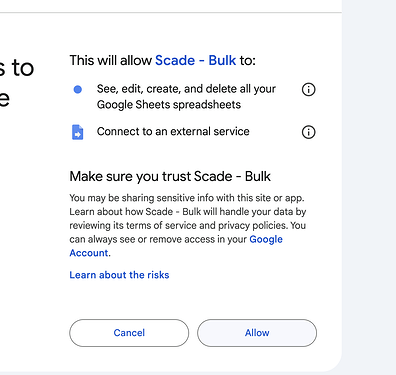
Step 9 - Allow Script to interact with your Spreadsheet

Google will ask you if you really sure you wanna trust this dev (Yourself, lol) and give an access to your files. Now worries, it happens inside your account and inside your sheet.

Also try to analyze this code with GPT and ask if it’s safe to run it in Google App Script.

Step 10 - Waiting

When you try to bulk run heavy flows - keep calm and wait. Each run took around 300s, so you’d need to wait a bit to finish your transcribation.

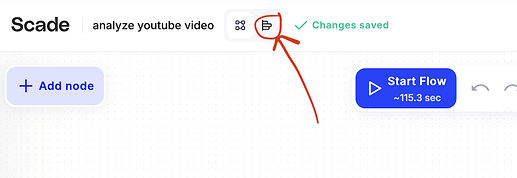
If you are not sure that API request has been successfully sent to Scade - open Run History
(this icon)

4 Likes

Now after some short time we are able to see the result of our workflow.


Home task
with chatpgt on Scade create another GS Script which will run the summary flow for you for selected cells.

3 Likes

Well it seems good, I was able to re-create it with chatgpt O1 node in Scade, but what the heck?

Why do we need to code it while we are talking about no-code solutions? @nik

4 Likes

@KarlieI agreed. I was also able to create a bulk summarizer for my lections, but I was thinking it would be BUILT-IN the platform? Or at least you can use some sortt of plugin or whatever you can find on Google addons store

3 Likes

@KarlieI @LizzAI
I completely understand your frustration, and I’d like to address your concerns one by one.


Bulk Operations Feature on the Platform

First off, regarding bulk operations, I want to reassure you that this feature will be available on Scade in the future. There was a recent release of the Publishing an AI App feature, which is why new improvements, like bulk operations, will take some time to implement. It’s definitely on the roadmap, so hang tight!


It’s Supposed to be 100% No-Code

I hear you. In the earlier days, Scade was very much marketed as a no-code platform, and that’s still a core part of its vision. However, things have evolved. Right now, I’d say Scade is focused on providing flexible possibilities for all builders—especially those who are already building and scaling AI apps in production.

This doesn’t mean that non-tech users or beginners are being left behind. Not at all. But Scade’s goal has grown to be more than just a prototyping tool. The aim now is to be a go-to production tool, which sometimes does require a bit of coding to unlock its full potential.

And just to clarify, the Google Sheets script that’s being shared was actually written entirely by a ChatGPT node. No extra effort needed—just copy-paste it in, and it works. I promise, no BS here.

3 Likes