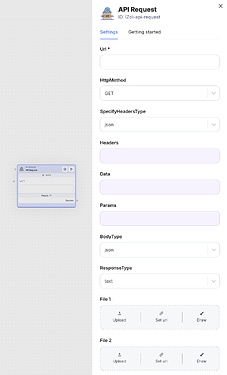
An API request is a call made by a client application to a server to perform a specific operation, such as retrieving, updating, or sending data, using defined endpoints and methods (e.g., GET, POST, PUT).
URL
The web address you are trying to communicate with. It tells the API where you want to send your request.
Example:
https://api.example.com/users (fetching user data)
https://api.example.com/upload (sending a file)
HTTP method (GET, POST, PUT, DELETE)
This defines what action you want to perform with the API.
-
GET: Fetches data from the server.
-
POST: Sends new data to the server (e.g., creating a new user).
-
PUT: Updates existing data on the server.
-
DELETE: Deletes data on the server.
Example:
GET: Retrieve a list of products.
POST: Add a new product to the database.
Headers
Additional information you send along with your request. Headers are used to tell the API how to handle your request or provide authentication.
Types:
-
Key-Pair: A simple format like key: value (e.g., Authorization: Bearer token).
-
JSON: Some APIs accept headers as JSON objects.
Example:
{
	"Authorization": "Bearer abc123",
	"Content-Type": "application/json"
}
Data
The information you send with your request (e.g., when creating a new record). Typically used with POST or PUT methods.
Example:
Sending a user’s name and email:
{
	"name": "John Doe",
	"email": "john@example.com"
}
Params
Extra information included in the URL itself. Often used to filter or customize the results of a GET request.
Example:
URL with parameters: https://api.example.com/users?age=30&country=US
This requests the API to find users who are 30 years old and located in the US.
{
    "age": 30,
    "country": "US",
}
Body type (JSON, Form-data, binary)
The format of the data you send in the request body.
-
JSON: The most common format, used for sending structured data.
-
Form-Data: Used for file uploads or HTML form submissions.
-
Binary: Raw data like images or files.
Example:
JSON: { “title”: “New Post”, “content”: “Hello World!” }
Form-Data: Files or key-value pairs sent in a form-like structure.
Response type (Text, JSON, file)
The format of the data you get back from the API.
-
Text: Plain text (e.g., “Success”).
-
JSON: Structured data you can parse and use in your app.
-
File: A file you can save, like a PDF or an image.
How to use on Scade:
Step 1: Set up a giphy developer account
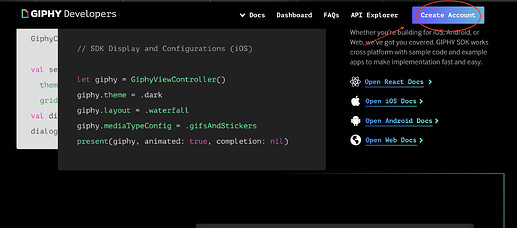
- Go to Giphy Developers: Visit https://developers.giphy.com/.
-
Sign Up or Log In: Create an account or log in if you already have one.
-
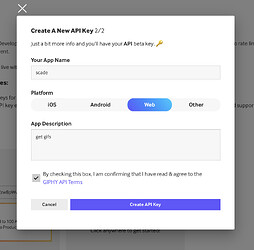
Get an API Key:
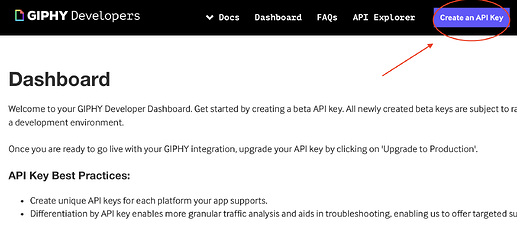
- Navigate to “Create an API Key”.
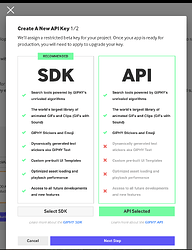
- Click “API” and then provide a name and description.
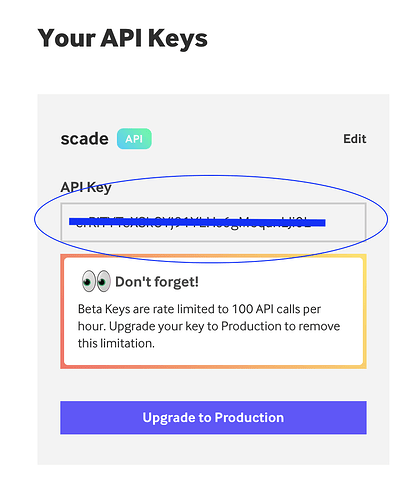
- Copy the generated API Key. You’ll need it for your workflow.
Step 2: Explore giphy’s API
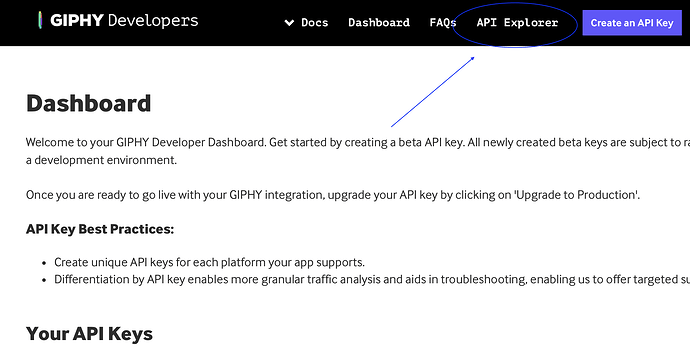
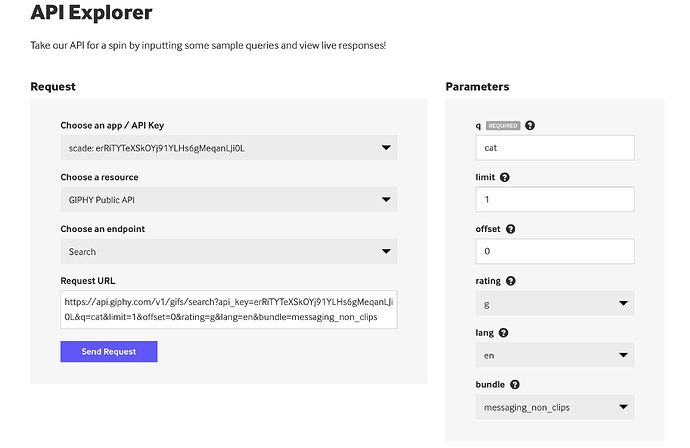
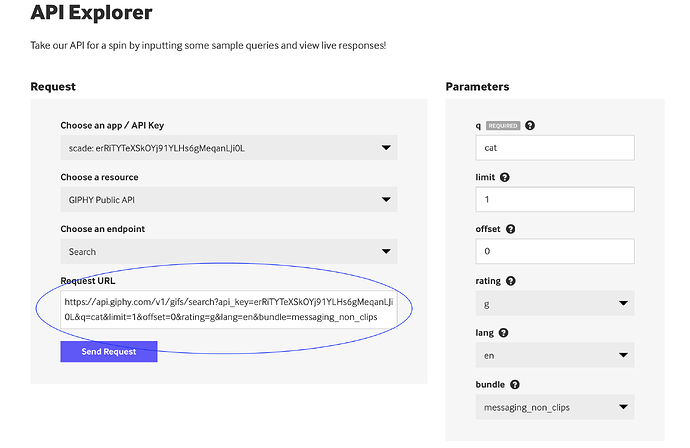
- From the Giphy Developer dashboard, click “API Explorer”.
-
Choose the “Search” endpoint for retrieving GIFs.
-
Configure Search Parameters:
- Set the query field (e.g., “cat”).
- Set limit to 1 (you only need one GIF).
- Leave other parameters as default for now.
Step 3: Set up the API request
- Copy the Generated URL:
- After configuring the query, copy the API request URL shown in the explorer.
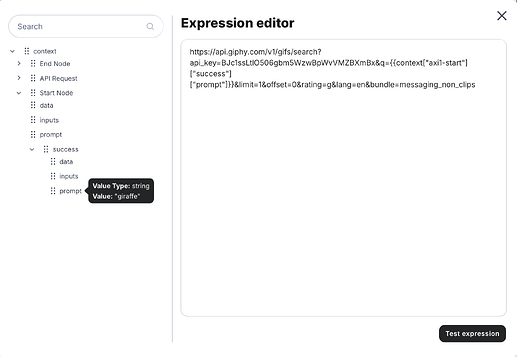
Example:
- Add an API Request Node:
- Drag or add the API Request Node onto your canvas.
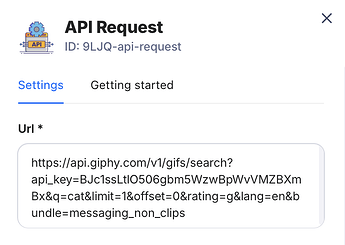
- Paste the copied URL into the URL field of the node.
Step 4: Get JSON data
Start the API node. This will fetch the GIF data but return it in plain text format initially. Change the Response Type of the API Request Node to JSON. Start the node again to see the structured JSON response. You will get a several results of different formats. It’s necessary to configure the end node or the following node to get single result.
Step 5: Configure the End node:
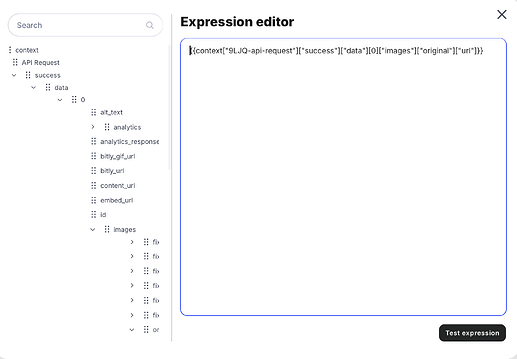
Add an End Node to your canvas. Create a File Input Field in the End Node. Change its type to Expression.
Example of the expression:
{{context[“api-request”][“success”][“data”][0][“images”][“original”][“url”]}}
Step 6: Add a text input for custom search
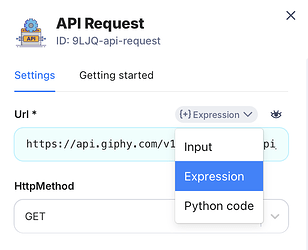
Create a Text Input Field in the Start Node. Enter a search term like “dog” or “space”. Link the Start Node to the API Node. In the API Node, change the URL Type to Expression. Replace the static word “cat” with the Start Node’s output. You can test the expression to check that the format is similar to original URL.
Step 7: Customize parameters
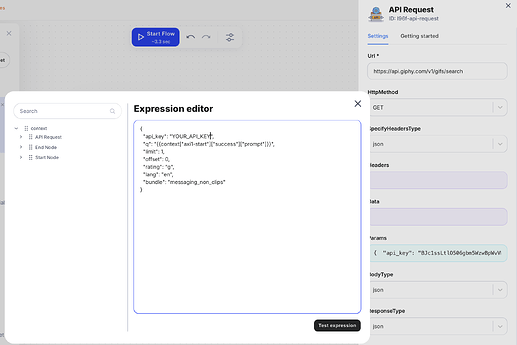
In the API Node, remove parameters like q=cat from the URL.
Add dynamic parameters in the JSON Parameters field of the API Node.
Example:
{
  "api_key": "your_key",
  "q": "{{context["axi1-start"]["success"]["prompt"]}}",
  "limit": 1,
  "offset": 0,
  "rating": "g",
  "lang": "en",
  "bundle": "messaging_non_clips"
}
You can enhance your Start Node by adding extra input fields for other parameters, just as we did with the q (search term). Map these new inputs to the API request parameters using expressions. Keep in mind that in JSON, each value has its own specific data type and semantics, which are crucial to ensure proper functionality.
Here are the key rules to follow
Strings
Always enclose string values in double quotes (e.g., “cat”).
Ensure input values are sanitized to avoid breaking the request (e.g., escaping special characters).
Numbers
Use numeric values for fields like limit or offset without quotes (e.g., 10).
Validate inputs to prevent negative or excessively high values.
Booleans
Use true or false without quotes for boolean fields.
Arrays
When adding multiple values, use square brackets with comma-separated values (e.g., [“value1”, “value2”]).
Ensure the array format matches the parameter’s requirements.
Null Values
Explicitly use null if a parameter is optional and should not hold a value.
Example (not an actual request):
{
  "q": "funny cat",          // String: Search query term
  "limit": 5,               // Number: Number of results to return
  "offset": 0,              // Number: Offset for pagination
  "rating": "g",            // String: Content rating (e.g., "g", "pg", "pg-13", "r")
  "lang": "en",             // String: Language code for the search
  "random_id": null,        // Null: Optional parameter left unassigned
  "options": ["looped", "high_quality"], // Array: Additional preferences
  "filter": true            // Boolean: Enable/disable a specific feature
}
By carefully matching the data types and semantics for each parameter, you ensure that your API requests remain valid and the responses meet your expectations.
